|
Sandbox 2 Manual
|
   |
   |
Object Placement and Modification
|
Sandbox 2 Manual
|
|
|

This section will cover the basics of placing an object down in the editor, select and deselect it and move it around, as well as various other modifications you can perform on an object.
It will also cover some other useful functions of the editor, to help arrange and manipulate your objects.
Selecting move mode and follow terrain
Firstly, you need to do a little setup to do with how the object is placed into the level.
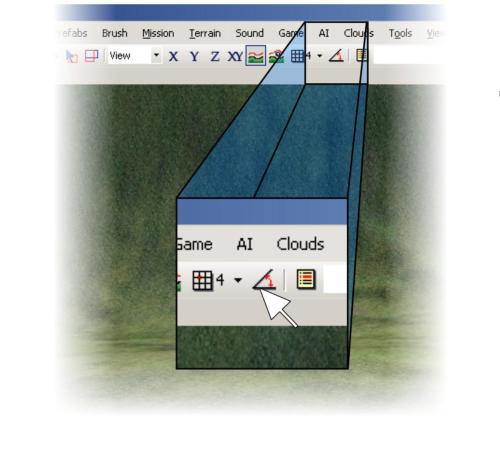
Select Move mode so you’re able to move the object. You can do this by clicking the button shown below. You should also select the “follow terrain” button, so the object will slide along the terrain when you drag it out.

Alternatively, Move Mode can be found in Edit > Editing mode > Move, and Follow Terrain can be found in Edit > Constrain > Constrain to Terrain/Geometry


A single click on the subsequent folders, Rocks and then Vulkan_Rocks, will lead you to a point something like this.

Move your mouse on to the name of brush you want in the brush browser, click and hold the left mouse button on the brush, drag the mouse into the main editor view and release the mouse button.
In this case, you want to drag out vulcan_rock_a

And now, you should see something like this.

If you don’t see something like this, don’t worry. Go back to the previous step about “move mode” and “follow terrain”, and make sure move mode is turned on.
Then, follow the instructions below.
If you accidentally lost your object or deselected it, press Ctrl-Z to undo your last action.
When you are in “move mode” with an object selected, press Ctrl + Shift + Left mouse button to “snap” the pivot point of the entity to the ground where you click.

So, now we have an object in view, lets deselect it and then select it again. There are 2 easy ways of deselecting objects – press Escape, or click anywhere else in the view screen (be careful not to click on another object though). Deselect your object now using one of these methods.
To select an object, simply move your mouse over the object and press the left mouse button.

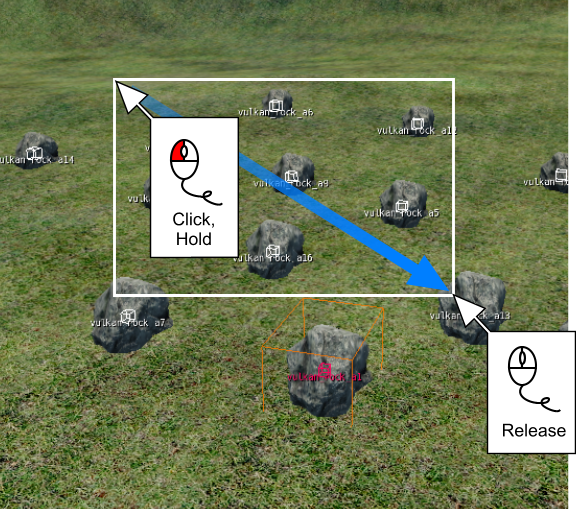
To select multiple objects, click and hold the left mouse button in the perspective view, drag a box around the objects you want to select, then release when all the objects required are inside the selection box.
Press Ctrl and click with the left mouse button to remove an object from your current selection.
Also, the same procedure will add an object to your current selection.


Alternatively, select the individual modes using the edit menu in the menu bar at the top of the screen.
Edit -> Editing mode -> Select Edit -> Editing mode -> Move Edit -> Editing mode -> Rotate Edit -> Editing mode -> Scale
Now, select your object, and you will see it has X, Y and Z selection bars, each corresponding to a different direction. The X bar is red, the Y bar is green and the Z bar is blue. The bar you previously had the mouse over will be yellow.
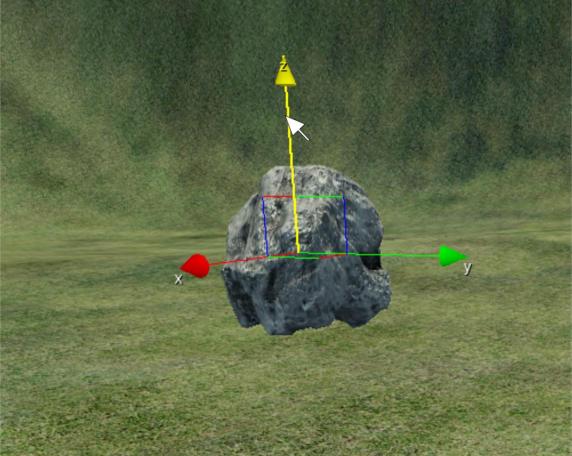
If you move your mouse on to one of the bars, click and hold down the left mouse button, you can drag it back and forth in the direction it’s pointing, along that axis.
You will notice between each bar, there is a square. Use this to drag along 2 different axis.
As with move, you can rotate your object using its control bars.

Edit -> Editing mode -> Rotate

Edit -> Editing mode -> Scale
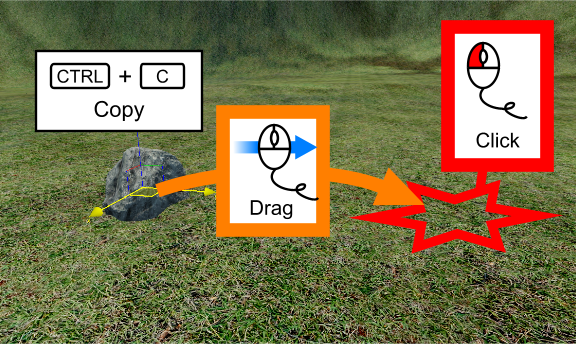
Simply select your object, press Ctrl-C, then move your mouse to where you want the copy of your object to be, then click the left mouse button.
You can also copy an object by going into the menu bar at the top of the screen.
Edit -> Clone (Ctrl+C, Ctrl+V)

Also accessed by: Edit Undo (Ctrl Z) Edit Redo
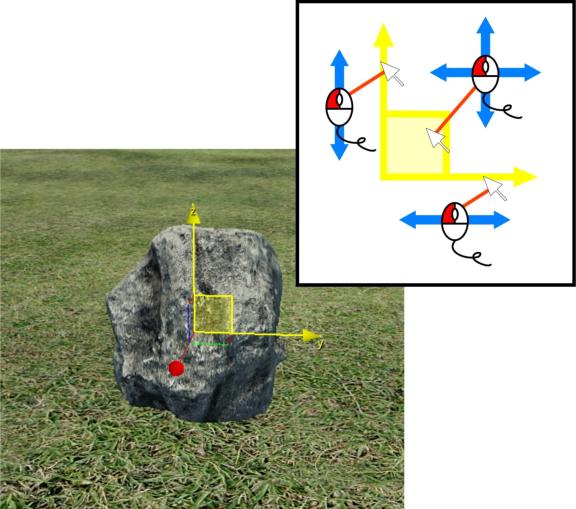
Shown below, the yellow highlight is the direction the object is restrained in. For example, the XY restraint will restrain the object to only move horizontally.

Also accessed by: Edit -> Constrain -> Constrain to X Axis Edit -> Constrain -> Constrain to Y Axis Edit -> Constrain -> Constrain to Z Axis Edit -> Constrain -> Constrain to XY Plane
The terrain snap and object/terrain snap make sure your objects move along the ground correctly. Terrain snap will only snap to the terrain itself. Object/Terrain snap will also move your objects along any other objects on the ground.
Please note, this will not affect the rotation of your object at all, and it will snap the object to the floor at its axis point.

Also accessed by: Edit -> Constrain -> Constrain to Terrain/Geometry
Click the button below once to turn snap to grid on. This will make sure any objects you move only move in distance “steps”.
Also accessed by: Display -> Snap to Grid

The small arrow directly next to the main movement snap button will bring up a drop down menu, which can be used to select the size of the grid to use to align against. Click Setup Grid.

This is what you should see after clicking Setup grid.

As for grid snap, angle snap will cause your objects to snap and only rotate by the predefined set amount.
Also accessed by: Display -> Snap Angle
Go to object and align to object
To use “go to selected object”, select the object you need, and click the button shown, and the perspective view window will center on the object you have selected.
To use “align selection”, select an object, press the align selection button, then click the destination object. All transforms (position, rotation, scale) will be copied from destination object to your initial selected object.

Also accessed by: Modify -> Goto Selection Modify -Y Align/Snap -> Align to Object
Object lock and object positional controls At the bottom of the screen, you’ll see several other controls.

Lock selection will make you unable to deselect the current object
The object position controls allow you to move an object to an exact position in the level, using the type in dialog boxes. Also, fine tuning an object’s position can be done using the up and down arrows to the right of each dialog box.
Also accessed by: Edit -> Lock Selection