|
Asset Creation Manual
|
   |
   |
Using the Polybump application
|
Asset Creation Manual
|
|
|
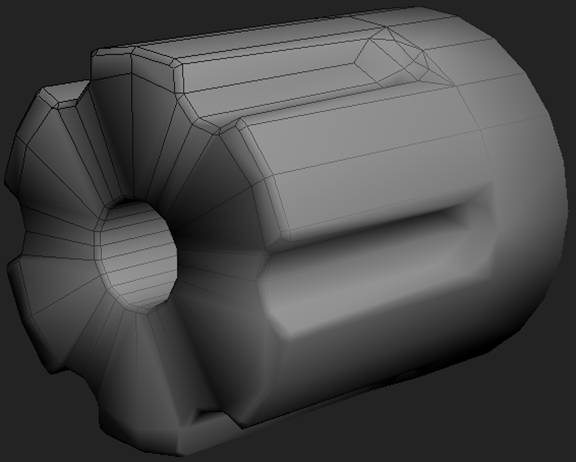
First, you need a high resolution mesh, and build a low resolution mesh around it. The surface information of the high polygon mesh will be baked into the low polygon mesh as a normal map. For this tutorial, we'll be using the cylinder of a revolver as an example object.
The low-res mesh should have a very tight fit to the high-res mesh at folds, edges, and corners, to make sure that the detail is captured correctly.

It is advisable to have all normals unified, or a "smooth" shading for the mesh, since there will be less discrepancies between the shading of the low and high poly mesh that polybump has to compensate for. The normal mapping algorithm can capture all polygon normal data of the high-res mesh, even beveled edges such as in our example. Reproducing these bevels works better with an entirely "smooth" low poly mesh, for best results on edges you should chamfer these edges on the low polygon mesh. For a more in-depth explanation of this, refer to the polybump reference document (link).
Try to keep the shading of the low-polygon free from irregularities. Small shading irregularities like in the picture above can be corrected by polybump and will hardly be visible.
Now you need to create a proper UVW mapping for the low-res mesh. Try to hide the texture seams in less prominent areas. Polybump can compensate for seams, but it should be avoided to have them in visually important areas, especially bevels.

As you can see, it's possible to mirror and duplicate a small piece of geometry to save UVW real estate, while avoiding seams in the final rendered normal map. Note that this only works well for objects with little texture detail, or the repetition would be obvious. Make sure that the normals of the resulting mesh are unified, and export the entire object as low poly mesh, not just the green part (in the picture), or you will get faceted shading as a result.
Once both meshes are finished, export them as .OBJ files and load up the polybump standalone application. Go to File - New to create a new surface file. This Crytek Surface File (.srf) is an intermediate file format that will contain the raw data that you calculated. You can export the final textures as CryTIF from this surfacefile once the calculations are done, and you can open the file later on and export them with different settings.
Go to "Document - Computation settings"

The following window will appear. For detailed instructions on the different options, please see the polybump reference (link).

Specify the .OBJ files you exported earlier. Choose one low poly mesh under 1 and one or more high poly meshes under 2 . You can adjust different quality settings under 5 . For now, leave them at their default, as seen in the picture. Pick the texture dimensions under 6 . For preliminary tests, it's best to use a low resolution as the calculation time will be much shorter.
Once you have adjusted all the settings, you can start calculating. Go to the document menu and select "start computation":

You will see a small progress window indicating the time left. After the calculation is finished, you will see a small preview window in the main window:

If you are experienced with normal maps, you will notice that the colors of the map are in world space format, rather than the usual tangent space. You can change this later on when you export the textures.
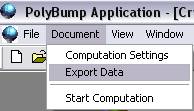
Once the calculation is finished, you are ready to export the textures. To do this, go to document - export data.
The following dialog will appear:

Again, please refer to the polybump reference (link) for detailed instruction on the options. For now, make sure that option number 4 (transform vectors to:) is set to tangent space, and hit "Apply Settings & Compile". You will find the resulting texture(s) in CryTif format in the same directory as the 3dsMax file and the polybump surfacefile.
You are done!
You can now export the low-poly mesh as .CGF file and load it into the Sandbox 2 editor. Put the normal map (_DDN.tif) into the normal map slot of the object's material, and if you rendered a horizon map, put it into the diffuse slot. Adjust the material so it has a high specularity or give it a reflection map to get a better impression of the normal map shading. Use the attached material and mesh as inspiration.

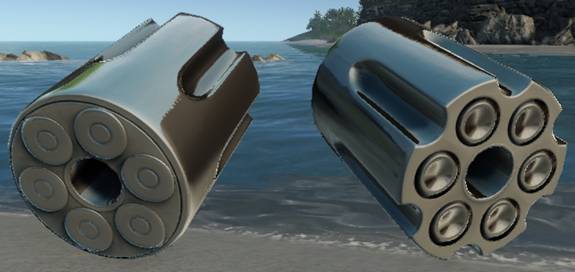
The low poly mesh with a DDNDIFF normal map and a chrome shader applied inside CryEngine2.
After restarting, go to "configure button sets" (see picture) to add polybump to the list of quick-access plugin buttons. 
Now hit "OK" and click on the polybump button that you just created. The following menu will appear in your command panel:
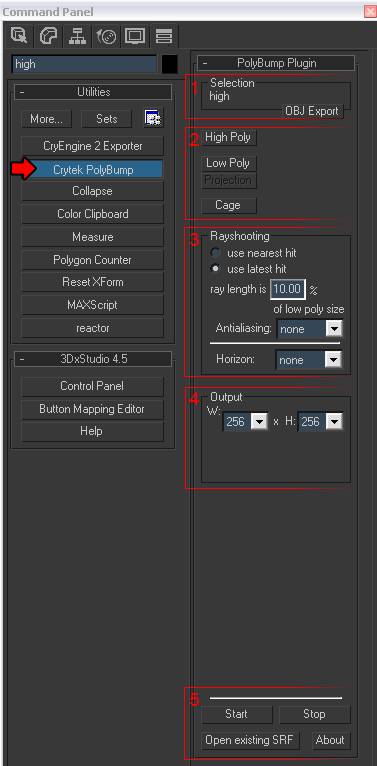
The options are similar to the standalone application and do the following:
1.) Displays your current selection, click OBJ export if you want to export it. 2.) Assigns your selection as either high or low poly object. Select the high poly object in your scene and click "high" to assign it. The name of the object will then appear next to the button. Do the same for the low poly object, and, if one is used, for the cage object. 3.) Rayshooting, Horizon and Anti-Aliasing quality settings. See the standalone section for more details. 4.) The texture dimensions. 5.) File menu. "Start" starts the calculation, "Stop” interrupts it. Select "open existing SRF" if you want to open a previously saved polybump surface file.
When you hit "Start", you will be prompted to create a new .SRF file in the same directory that the 3dsMax scene is in. Once you created the file, the calculation will start. After it has finished, a pop-up window will appear that lets you select the settings for exporting the textures. See the standalone section for details on this. Once you have adjusted the settings to your needs, click "apply settings & compile" to export the textures.