|
Sandbox 2 Manual
|
   |
   |
Basic Trackview Tutorial
|
Sandbox 2 Manual
|
|
|
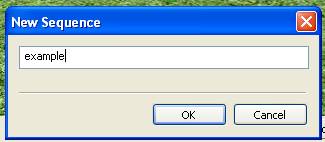
Once Track view is open click on the Add Sequence icon.

Name the sequence “example” then click OK.
Once you have created your new scene it is time to setup the properties for this specific scene, click on the Edit Sequence icon

With the Sequence Properties** window open, check the following boxes:
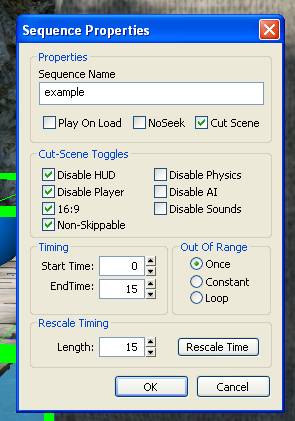
Check Disable Hud, this disable the default players hud, Disable Player** hides the player during the scene, 16:9 enables the black bar effect, and Non_Skippable** means that if the player presses space to skip the scene it will continue to play, the EndTime has been adjusted also for a scene of 15 seconds in length.
The first element to add to the scene is a Scene Node. This enables us to switch cameras.

However as no camera has been added to the level a camera can not be selected. Next we need to add a camera, in the select camera and place one into the level.


The camera entity in the Sandbox 2 editor.
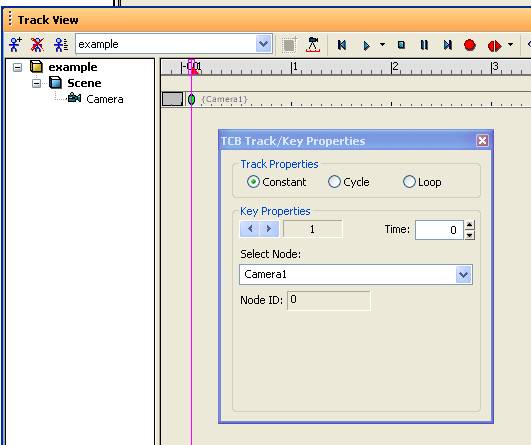
Next we want to select the scene to use this camera, Double click in the time line at frame 0 to add a key, once a key has been added right click on the key to bring up the Key Properties, click the drop down box and select the newly added “Camera1 ”
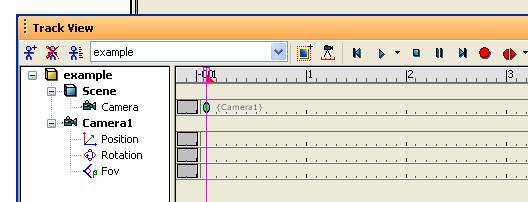
Next we want to add the camera to the Track view so we are able to animate the camera moving,
Select the camera to add it to the scene track in the Track view, Select the camera and click the Add Selected Node** icon in the Track view.

The camera should now appear in the Track view as below.
Next we need to ad an object of interest to the scene, for the camera to focus on.
In this example we will add a human character with a simple walk animation.
For characters in cinematics an AnimObject is used, this is used as apposed to an Ai Entity for performance reasons and also as an AnimObject dosnt have AI, the AI system won’t be conflicting/fighting with the Track view system.
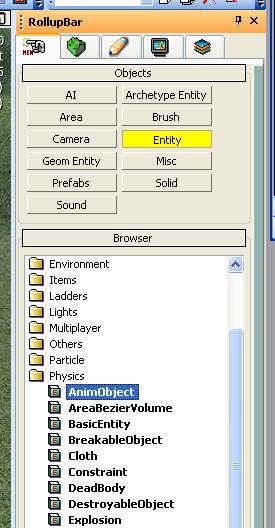
Select the AnimObject under the RollupBar and left drag it into the view port,
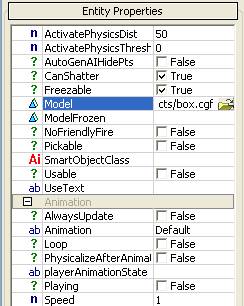
With the AnimObject selected, click in the Entity Properties** in the roll up bar, we are going to replace the default rectangular object with a human character, select the Model field and click on the folder icon.
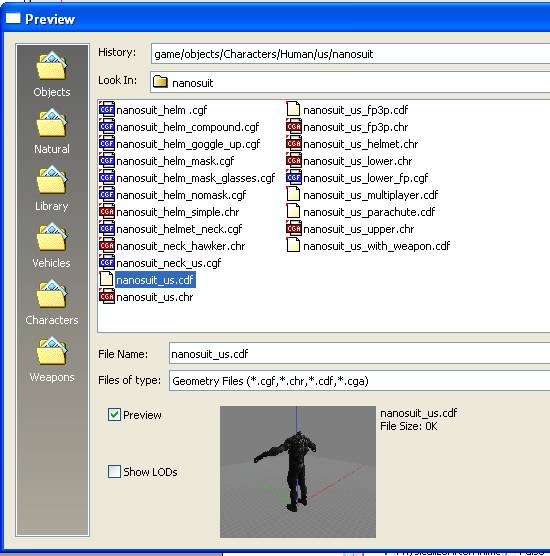
Next we need to select a character for use with the scene. For this scene we will use the player’s Nanosuit.
Browse for the file under objects/characters/human/us/nanosuit
Next we will add the character to the Track view, select the AnimObject and in the Track view click the Add Selected Node.
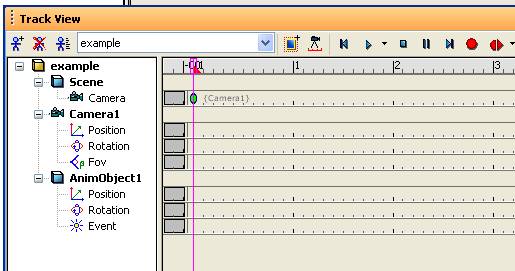
The Track view should now look like the image below.
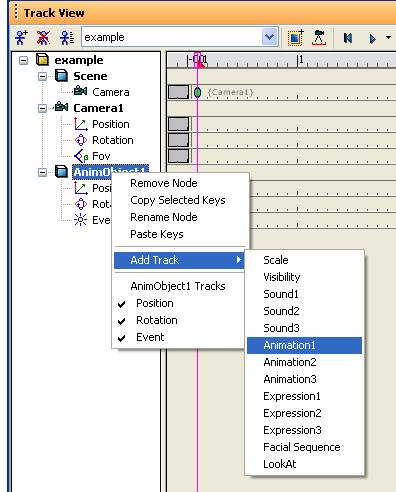
With the AnimObject added, next we want to add an animation track to animate the character, right click on the entity, select Add Track > Animation1


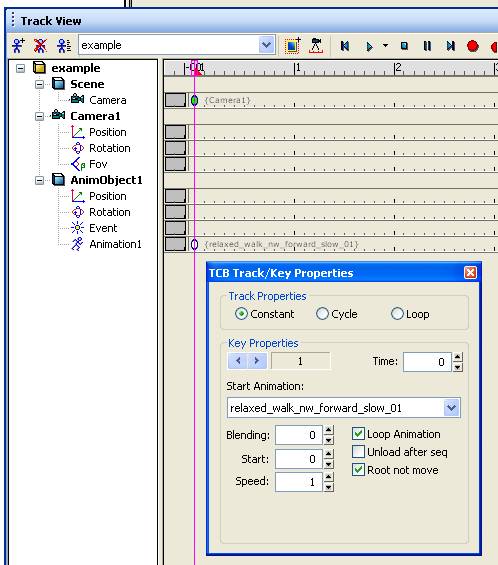
Next we will select an animation for the character. Double click at frame 0 to add a key in the animation track, then right click on the key to bring up the Key Properties, then click the drop down box and scroll down to select the animation “relaxed_walk_nw_forward_slow_01 ” also click the boxes Loop Animation** to make the animation loop forever, and also Root not move so the animation does not offset and pop back after playing

The next step is to key frame the character as he walks across the ground, currently as the character walks he is sliding on a spot.
First make sure the character is selected and the Track view slider is set to frame 0, once selected click the Record button in the Trackview editor.

In the perspective view, move the character to the desired starting position at frame 0, this will record the position and add a positional key for the character, next drag the time slider in the Track view to the final frame at 15 seconds, you should notice a key appearing at frame zero, now at frame 15 with the record button still depressed move the character to the desired end position.
If you now scrub through the scene with the time slider the character should now appear to be walking between two points, adjust the end position to get a natural looking walk.
With the character now walking along we want to have the camera following him and panning around as he walks.
To look through the perspective of the new camera right click on perspective to bring down a menu for the view port configuration, then select Camera > Camera1, you will now be looking through the new Camera1.


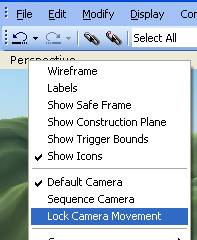
At first the camera is locked and can not be manipulated like a standard perspective viewport, to unlock the camera first uncheck the Lock Camera Movement.
As a built in safety measure to stop the user accidentally moving the camera thinking it’s the perspective window, the button in the Track view must also be depressed.
We are now ready to animate the camera, set the time slider to frame 0 and make sure you have the camera selected and the button depressed in the Track view, with the viewport set to, move the viewport as desired to frame the shot,
Next drag the time slider in the Track view to 5 seconds and position the camera as desired, continue this process at times 10 seconds and 15 seconds.
Uncheck the record button to avoid accidentally animating the camera, if you now scrub the time slider in the Track view back and forth you should see the camera animating along the new path and the character walking along.
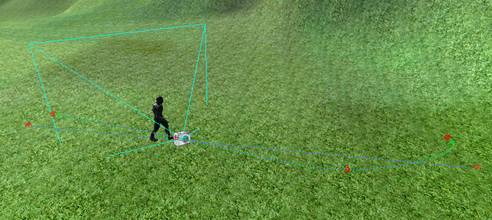
Next we want to set the camera back to the default perspective, right click on Camera1 and select Default Camera.
We should see an overview of the scene with splines depicting the path of the camera and character.

If we simply drop into game “crtl+g” the scene will not play by default, we first have to set up logic using the Flow Graph editor.
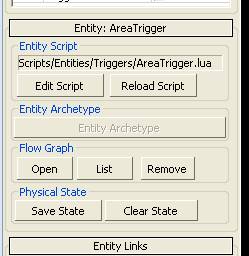
First we need to add an Entity to contain the Flow Graph, it is possible to contain the Flow Graph within the AnimObject character, however having a specific entity is safer as it generally will be harder to delete by accident, for this setup we usually use an AreaTrigger.


Select the AreaTrigger and drag it into the view port, rename “cine_example_FG” next we need to create the flow graph, click on the CreateStyle icon under Flow Graph.


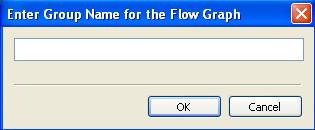
A window called Enter Group Name for the Flow Graph will pop up, call it “cinematics” this is useful to contain all your flow graphs that are related to cinematics.

With the AreaTrigger selected click on the Open button to start working on the Flow Graph for the scene.

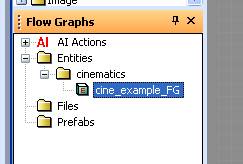
The Flow Graph editor will now open, make sure that you have your newly created flow graph selected to start working on it.
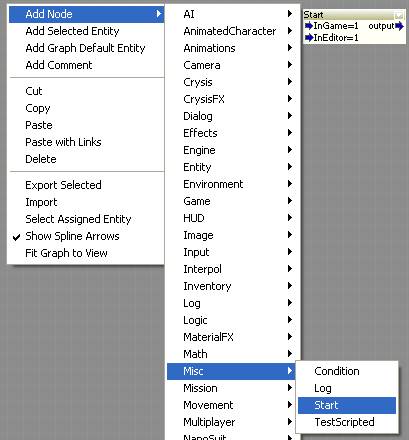
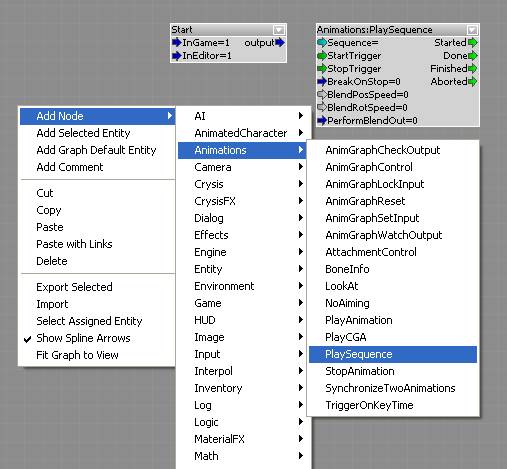
For this tutorial we simple want the scene to start as soon as the player drops into game, for this functionality we will add a Misc>Start node.
Right click on the grey area to add a new node and select the Start node, this will trigger as soon as the player drops into game.


Next we need the start node to trigger the sequence to play, by adding a Animations:PlaySequence node.
With the two nodes added we need to connect them to setup the logic, simply click and hold on the blue arrow port and drag it into the green StartTrigger input port.


Next we need to select which Sequence to play, double click on the Animations:PlaySequence node, in the Inputs settings on the right, click on the three dots to open the Select Sequence** pop up, select the sequence that you have created “” and click ok.
This is what the current flow graph should look like.
If you now drop into game “ctrl+g” the scene should play automatically on start.
In this scene we are creating the illusion that the character in the scene is the player, thus after the scene has finished we want to hide the AnimObject character, we can do this in the Track view. Open the Track view and select the AnimObject character entity, in the event track double click to add a key frame at 15 seconds, right click on the key frame to bring up the Key Properties , under the Fire Event: drop down box select Hide.
This will hide the character when the scene gets to the last frame, however if you scrub over the scene in the Track view the character will now disappear, thus we need to add an Unhide event at frame 0, again double click in the event track to add a key frame, right click on the key frame to bring up the Key Properties, under the Fire Event drop down box select Unhide.
Now the character will unhide and hide accordingly.
To complete the illusion we need to make the player start/continue from where the actor finished in the scene. Currently the player will start from where they dropped into game which creates a break the illusion.
First we need to get the end position of the AnimObject character, scrub the timeline in the track view to 15 seconds, next we need to reference this point,
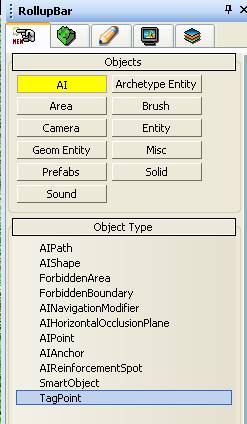
A useful object to use is an AI TagPoint as it is hidden in game mode, select the tag point and place near the character, rename “cine_character_endpoint”
To get perfect alignment to the character we will use the Align Selection tool select the tag point and then click the align selection icon then click on the character, this should move the tag point to the correct position.
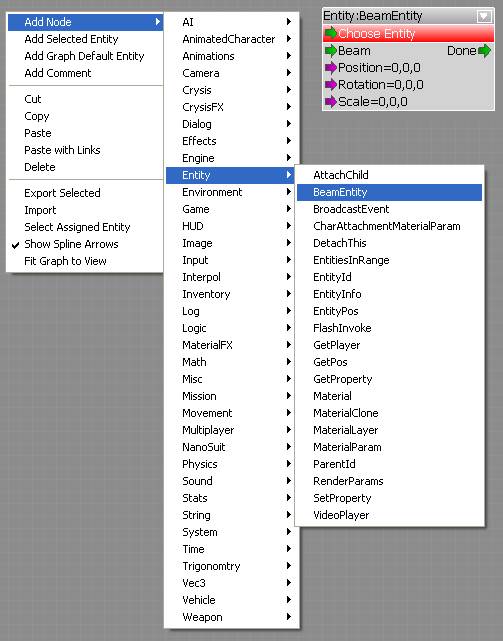
Next we need to add logic in the flow graph to the player to this position after the scene, open the flow graph editor and select the flow graph, right click on the grey area to add a new node Entity:BeamEntity.
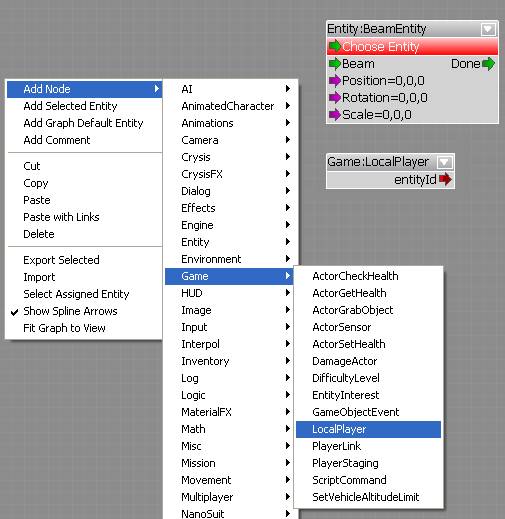
The Entity we want to be beaming is the player, add the node Game:LocalPlayer
Last we need to add a node which references the position of the AI TagPoint where the player ends, add the node Entiy:EntityPos.
With these new nodes added connect the flow graph as shown below by linking the output to inputs, to assign the tag point to the Entity:EntityPos node, select the AI TagPoint in the viewport, then right click on the Entity:EntityPos flow graph node and select Assign Selected Entity.
Now when the scene has completed the player will be located at the position of the tag point.
For this scene we will fade in from black at start and then fade out again to black at the end and finally fade in from black once the player has control.
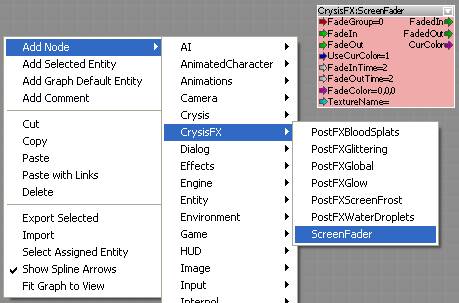
Open the flow graph editor and select the flow graph you have been working on, right click to add a new CrysisFX>ScreenFader node.
Select the new CrysisFX>ScreenFader node and in the inputs setting adjust the fade in and fade out times to 4.
Next duplicate the CrysisFX>ScreenFader node by right clicking on it and clicking copy, then right click on the grey area and click paste, do this twice so there are a total of three ScreenFader nodes.
Next we need to add a new AreaTrigger to trigger the fade out logic in the flow graph from the Track view.
Add a new AreaTrigger into the viewport and rename “cine_FadeOut_DT” DT is for Dummy Trigger which is used to send events from the track view to the flow graph.
Next add the cine_FadeOut_DT to the track view by clicking the Add Selected Node** icon.
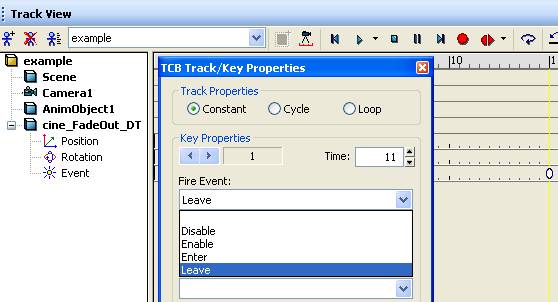
Under the event track for the cine_FadeOut_DT add a key frame at 11 seconds. right click on the key frame to bring up the Key Properties and under Fire Event: set to Leave.
Next open the flow graph editor, right click on the grey space and select Add Selected Entity. This will add the AreaTrigger to the flow graph. With all the nodes now added to the flow graph, it is now time to link the logic together, setup the flow graph as pictured below, Simply click and drag the output from a node to the corresponding node input to make a connection.