3rd person weapon models and attachments
The 3rd person weapons are polygon reduced versions of the 1st person version, with helpers attached. The available attachments might differ from weapon to weapon.
The example below is based on a Crysis asset.
General Setup in 3d applications
Naming convention
To distinguish between 1st and 3rd person weapons, add the postfix "_tp" to the object name, i.e. rifle_tp.cgf or rifle_tp.max
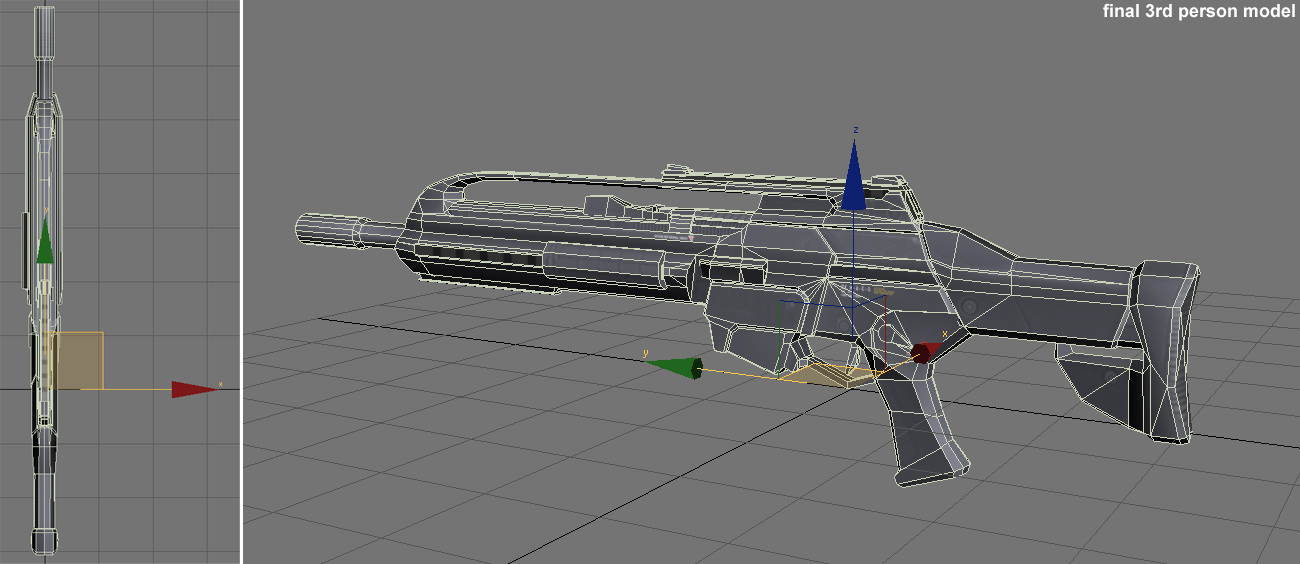
Pivot Orientation and position
In order to ensure the perfect fit to the character, the weapon should be placed in the correct position and the pivot aligned to the
weapon_bone 's pivot (rotation and position). Then the weapon can be rotated to 0/0/0 and placed in the origin of the world.
- example for 3rd person model orientation and position to the character's "weapon_bone"
When viewed from the top view, the model and its pivot should face into to the positive y-axis direction.
The pivot position needs to be in the origin of the world.
- example for 3rd person model orientation and position in relation to the World

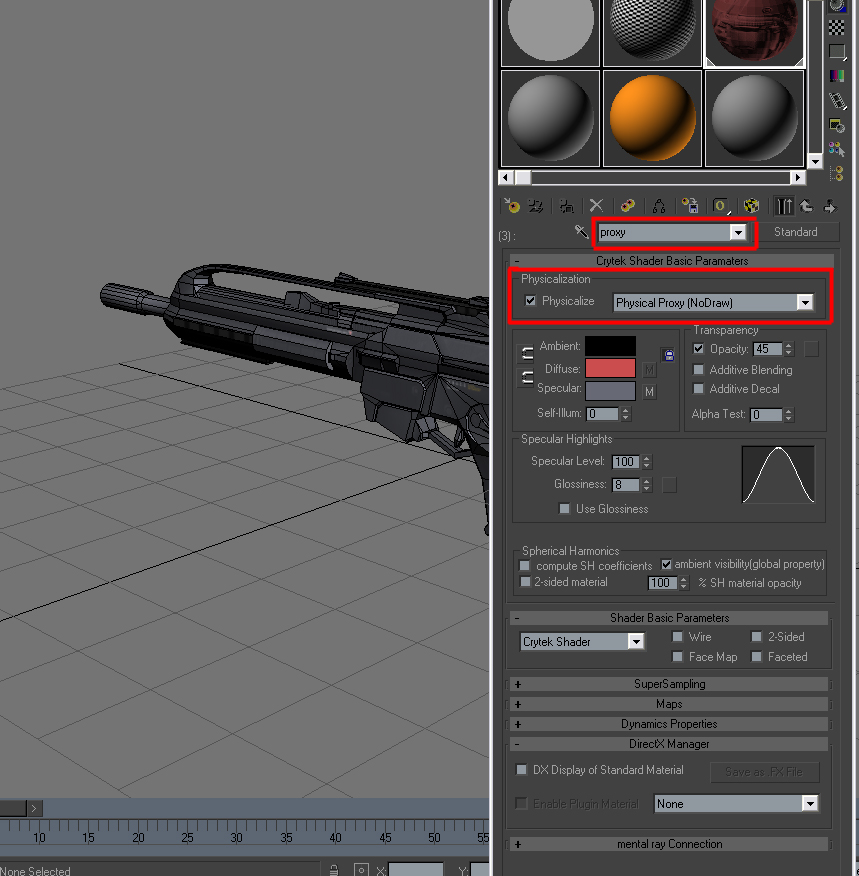
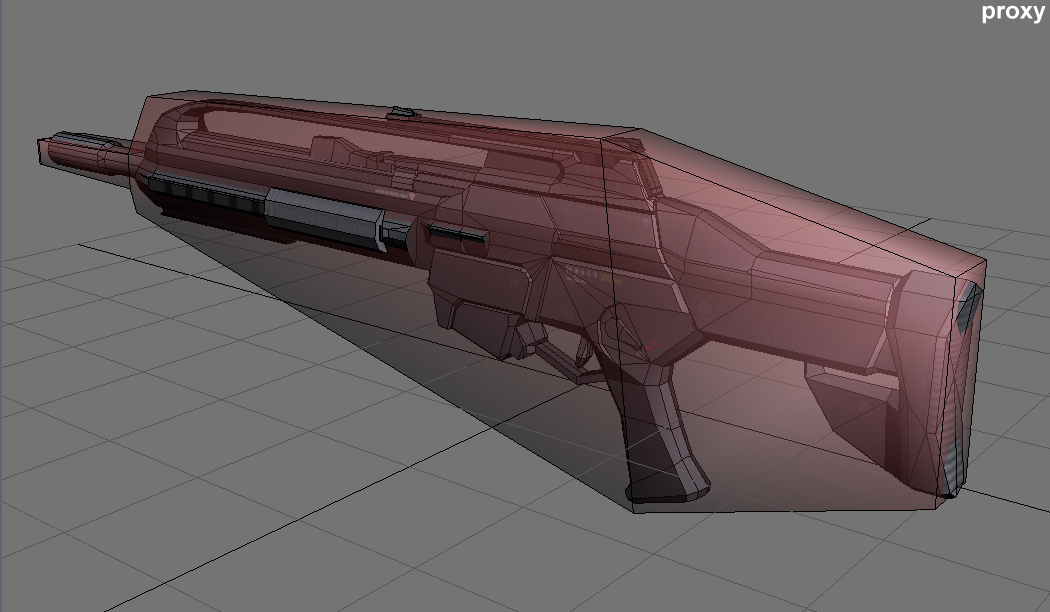
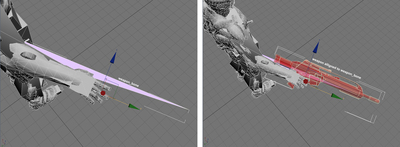
Proxy
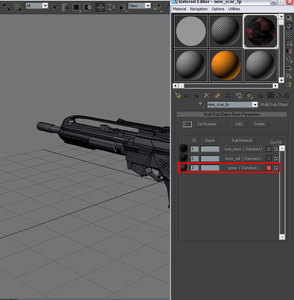
Next step should be the creation of a proxy for the 3rd person weapon . There for you need first a Mat ID for proxy in material. There for we add a Mat ID in the material editor of 3ds Max.
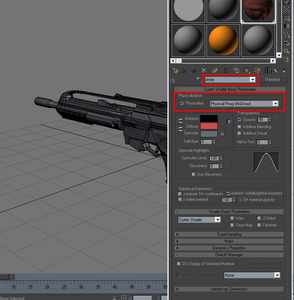
Mark the physicalize option and set to Physical Proxy (No Draw)
After setting up the material correctly , create the proxy mesh to weapon model , set the right MAT_ID, set only one smoothing group for proxy and attach proxy to the main weapon model.

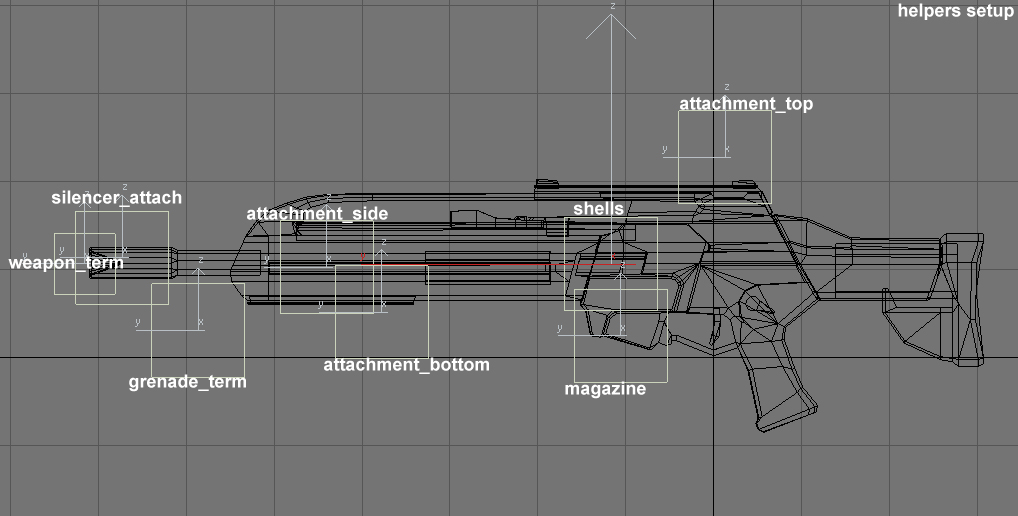
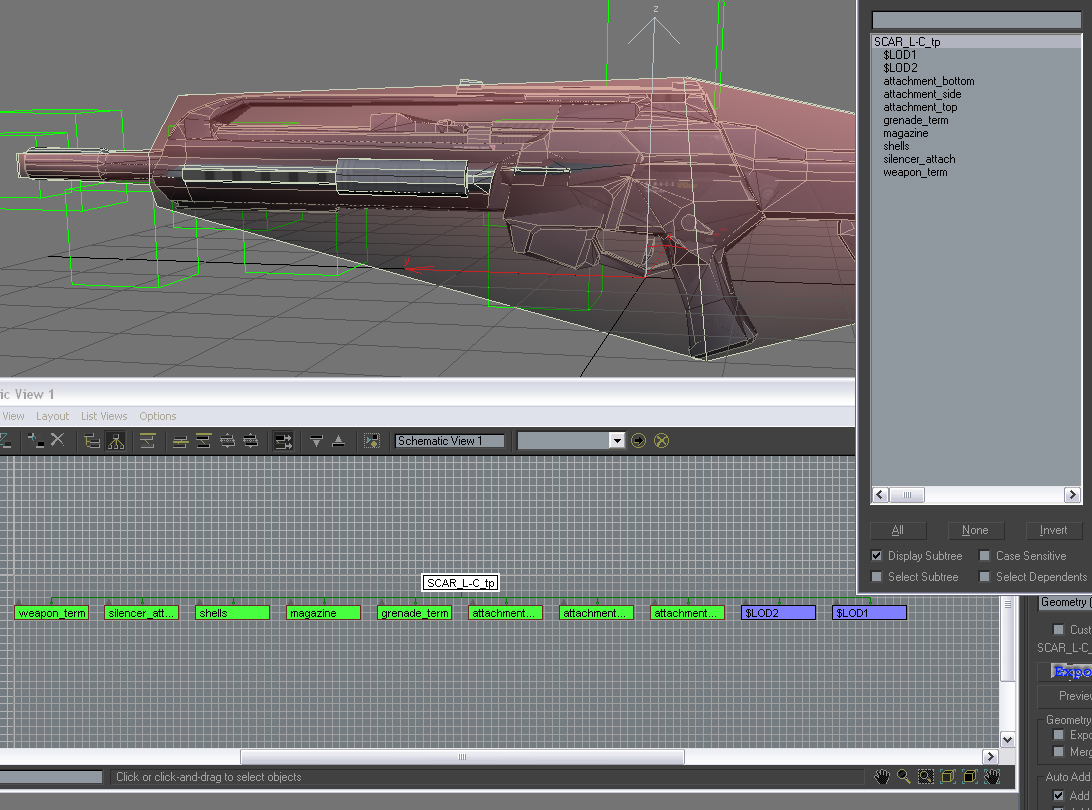
adding helpers to mesh
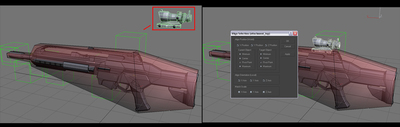
Create Dummy objects (in 3dsMax) as standins for weapon attachments in Sandbox. They must be oriented to the positive y-Axis (see Screenshot).
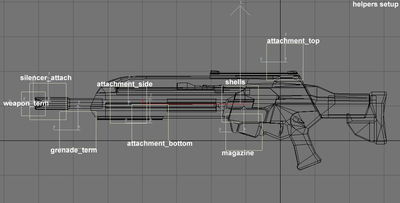
List of helpers
- Attachment_top (for attachment on top of the weapon)
- Attachment_bottom (for attachments on bottom of the weapon)
- Attachment_side (for attachments on the side of the weapon)
- Magazine (for magazine only)
- Shells (for shells ejecting)
- Silencer_attach (for silencer at the front of the weapon)
- Weapon_term (for muzzelflashes only)
- grenade_term (muzzelflash for grenade launcher)
Debugging of Attachment helpers in 3ds Max:
After you placed the helpers correctly and named them correctly you can check if the positions of the helpers are bug free. For this you have to merge in an attachment to the max file and align it to the helper you want later use as reference point for this attachment.
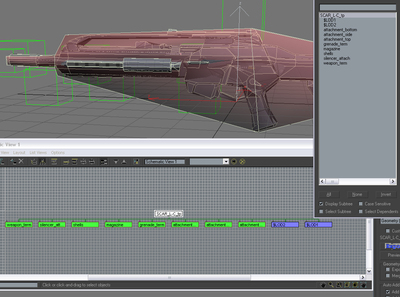
After all helpers are set up , the helpers must be linked to the main model
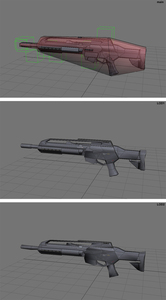
Level of detail settings
Next step is to add LOD s to the main model, create LOD1, LOD2 and link them to the base mesh.
Export Setup
Export only the base mesh. if linked correctly, the LOD s and helpers will be automatically exported.
"Merge all Nodes" needs to be unchecked in the exporter settings.
Setup in Sandbox
The object can be placed as a pickup in the level (as GeomEntity) or be choosen by scripts for AI characters.
Debug
- To check the pivot of base mesh you have to use the character editor, load a character and align the weapon to the weapon bone.
- For scale or rotation problems its necessary to use the RESET X-FORM Modifier