|
Asset Creation Manual
|
   |
   |
How to create Wrinkle maps
|
Asset Creation Manual
|
|
|
For this case we use wrinkle maps which are blended via morphtargets.
It is a special texture derived from two normal maps (in our case a frown and a eye brow raiser facial expression) and manually created in photoshop.
For a frown for example you lower the eyebrows. The engine recognizes that there are some vertices moving in the eyebrow area and fade the wrinkle map in where the vertices are moving. When the vertices move very much the wrinkle map fade in very strong. On areas where is not much vertex moving you will not see much of your wrinklemap.
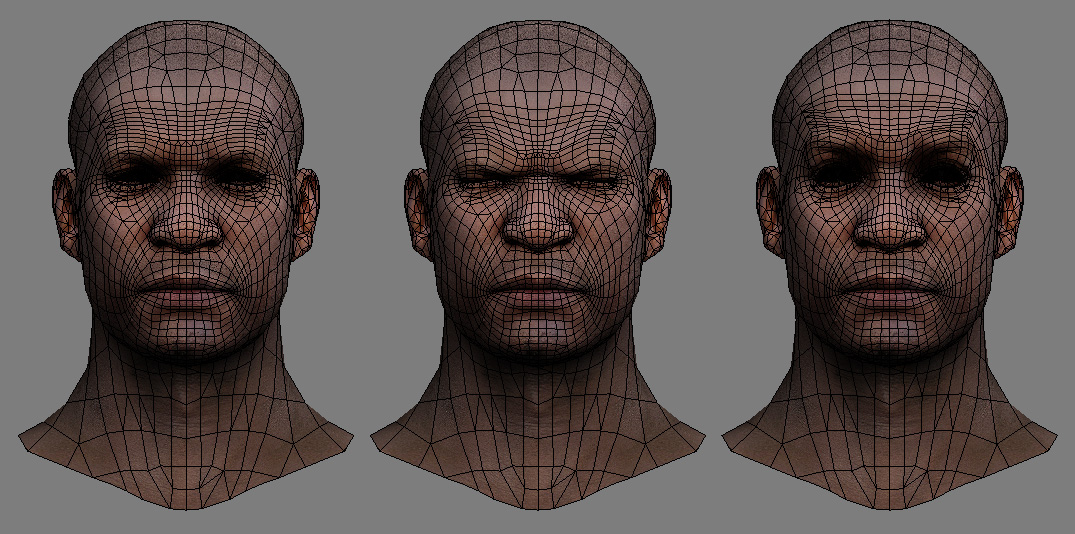
Export these heads separately as OBJ. to your favor sculpting tool to create highpoly meshes with detailed wrinkles. Only work on the areas which are influenced by the morphs. Keep the lowpoly version.

You need to create normal maps and occlusion maps with Polybump from both highpoly models. (explanation below for the standalone version of the Polybump application)
Choose your exported lowpoly mesh as “Low Poly File” and the sculpted highpoly version with wrinkles as “High Poly Files”.
When the mesh of the lowpoly mesh isn’t very dense, it’s recommend to subdivide the lowpoly model before you export it.
Also activate “Horizon”. The Horizon map is an occlusionmap which will give us later some additional shadows to the wrinkles.

After the calculation you have four maps, two normalmaps and two acc maps.
Now we have to merge our calculated maps together to save memory
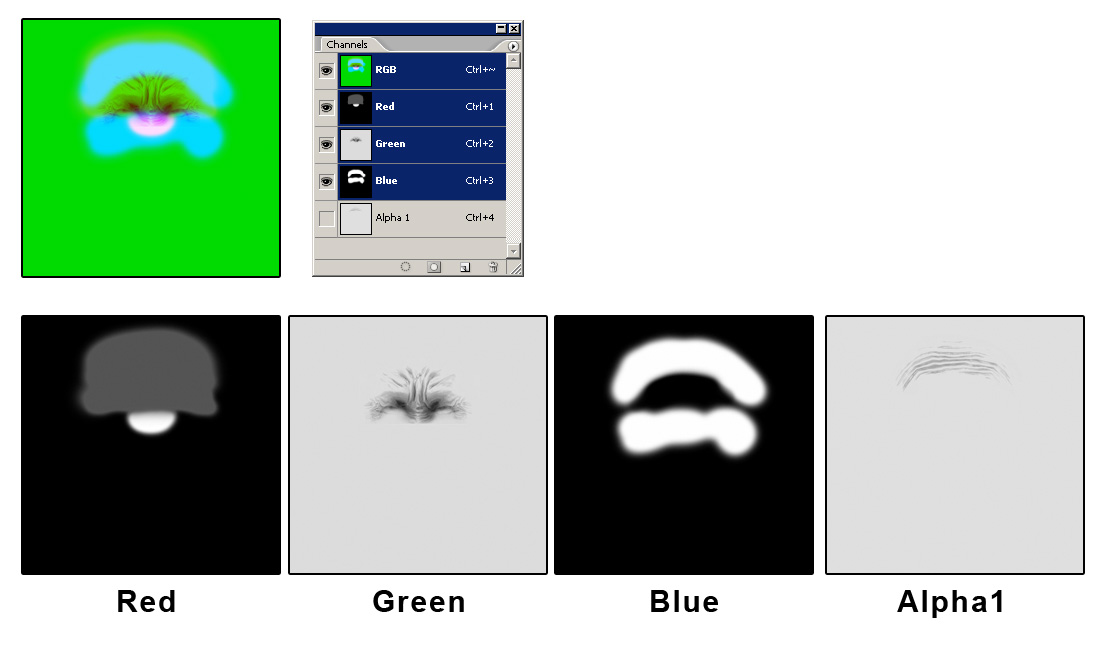
Wrinklemap:
Open both DDN files in photoshop. Fill the gray space with the neutral normalmap color (128,128,255)
Open a new document of the size of your normalmaps and create an alpha channel.
Now copy the red and green channels of your brow lower normalmap into the new file.
After this copy the red channel of the brow raiser normalmap into the blue channel and the green channel of the brow raiser in the alpha channel.
When you save the file as crytiff you have to choose the uncompressed prefab.

Weightingmap:
Because of the fact, that some areas of the wrinkle map get displayed very strong where is much vertex movement and other areas nearly not visible because of less vertex movement we can create a weightmap. In this weightmap we have to paint in areas which shall be visible stronger than others. The weightmap also includes the acc maps which give our wrinkle some extra shadows.
Paint the weighting for the brow lowerer in the red Channel. Black means no influence and white is the strongest influence which you can paint.
Save this map with the “Diffuse_highQ” present.
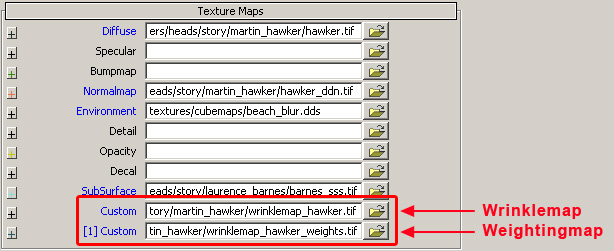
You need to set up the textures in the material editor in order to use it.
Setting up wrinkle maps in the material file
Activate “Wrinkle blending”in the Shader Generatons Params

After you activated wrinkle blending you get 3 new options in the “Shader Params”. Wrinkles blend, wrinkles bump scale and wrinkles diffuse blend.

After setting up the material file your wrinkle map is ready to use. Don’t forget, you see the wrinkles only when your head is using morphtargets. Here are some comparison screenshot, with and without wrinklemap.
