|
Sandbox 2 Manual
|
   |
   |
How to Set Up an AI with More Advanced Behaviour
|
Sandbox 2 Manual
|
|
|

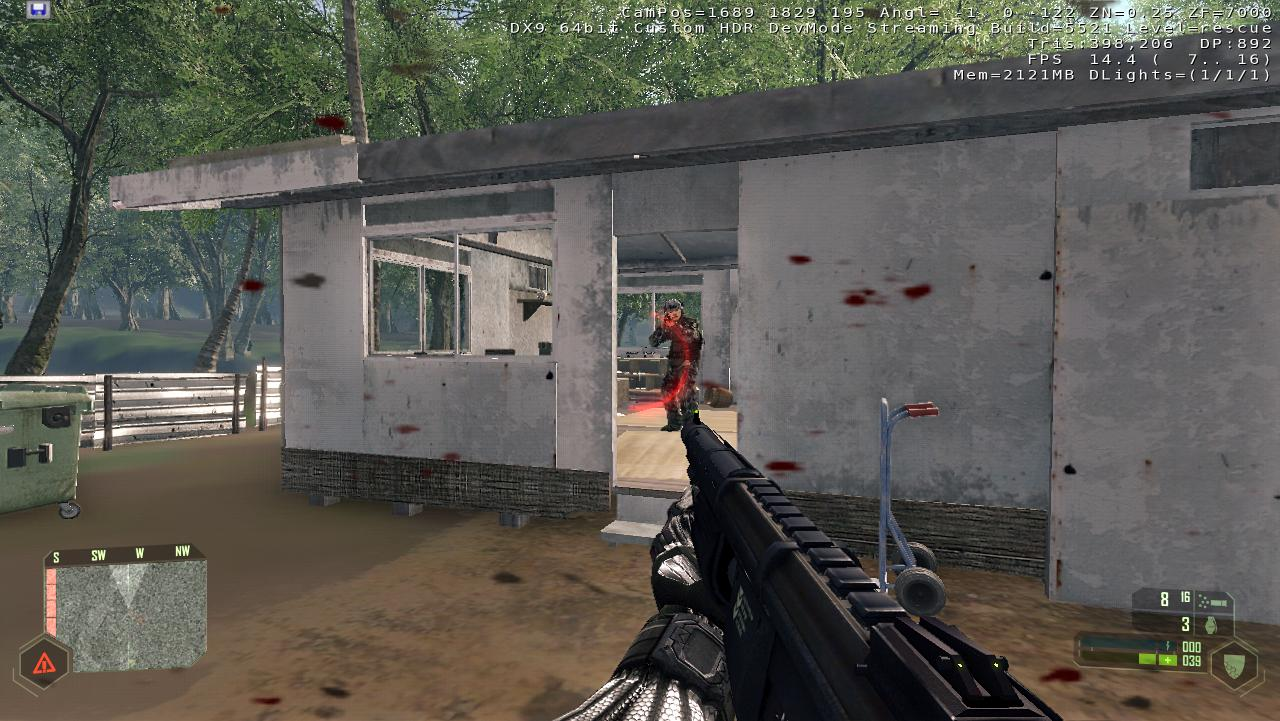
This tutorial will show you how to place enemies into the level and tell them where they can walk and hide. By default they will shoot at the player on sight.
The look of the AI characters, their weapon handling, how far they can see and hear, advanced behaviors such as group tactics, conversation with squad mates, use of vehicles and interactions with smart objects is described in other tutorials and the reference library.
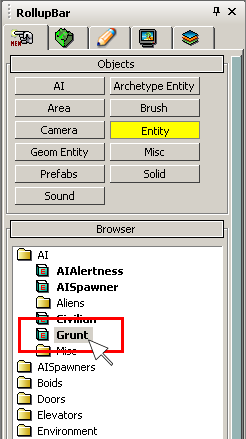
Drag the AI Grunt Entity from the Objects section of the RollupBar into the perspective viewport.
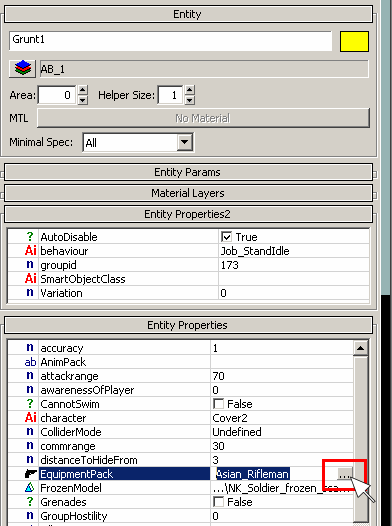
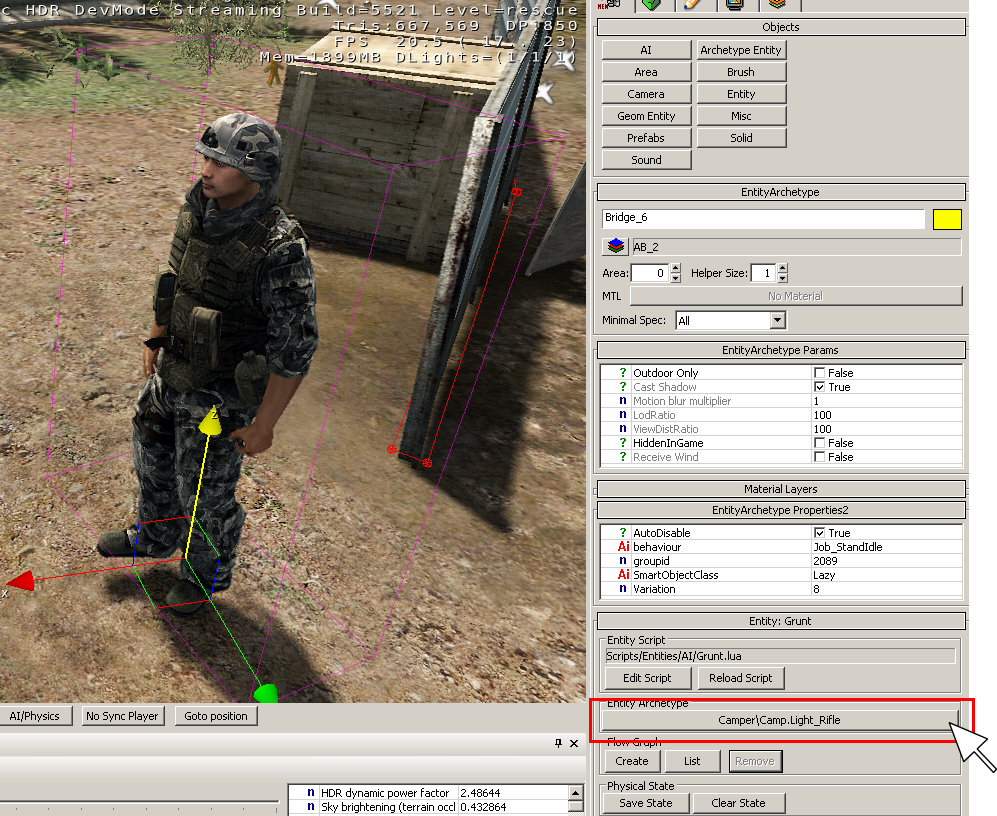
Important: It's currently required to click on the Reload Script button (located below the entity properties) once in order to have the grunt start using the selected equipment pack.


The AI navigation can be generated by clicking on the Generate All Navigation item of the AI menu.

Typing ai_DebugDraw=79 in the Console will show you if a triangulation is already setup, this means the AI will be able to find its way from one point to another without bumping into obstacles.

AI will automatically walk around Vegetation objects if set up correctly.
If you want them to hide behind a tree, you just need to set the Hideable flag in the Vegetation properties.
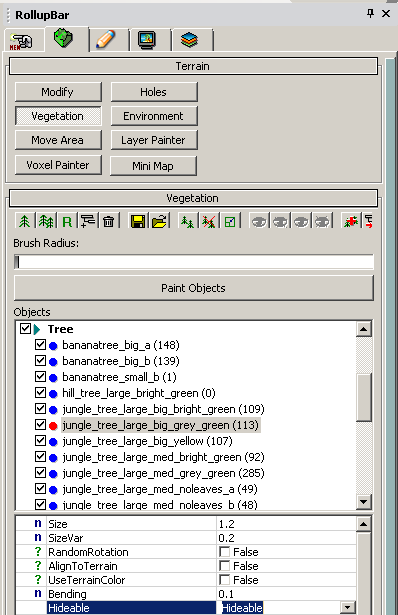
Next, adjust the AIRadius of the Vegetation so the AI knows how big the Vegetation object is.

AI will automatically walk around physicalized entities such as vehicles.
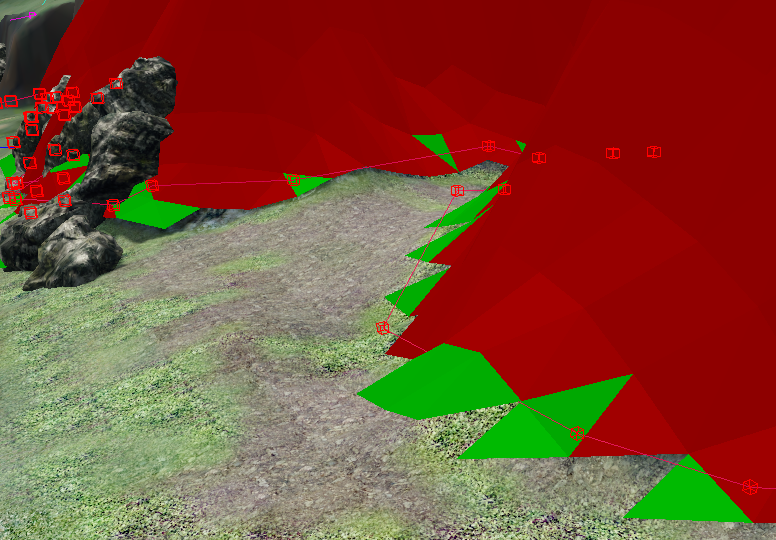
Typing ai_debugdraw 85 in the Console will display all areas that are too steep to climb (red) and areas that may cause sliding when you try to walk on them (green).
Now we need to surround all such areas carefully with ForbiddenAreas (see section below).
You need to surround each internal waypoint region with a ForbiddenArea, this way the AI will not try to walk through walls and other objects.
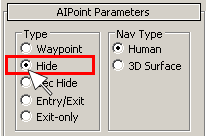
Click on AI/ForbiddenArea and create a shape around the area you want to make impassable (for example the external walls of a building). Select ForbiddenArea from the menu as shown below.

Once your ForbiddenArea is created and your level triangulated, it will not be possible for the AI to walk through the walls.
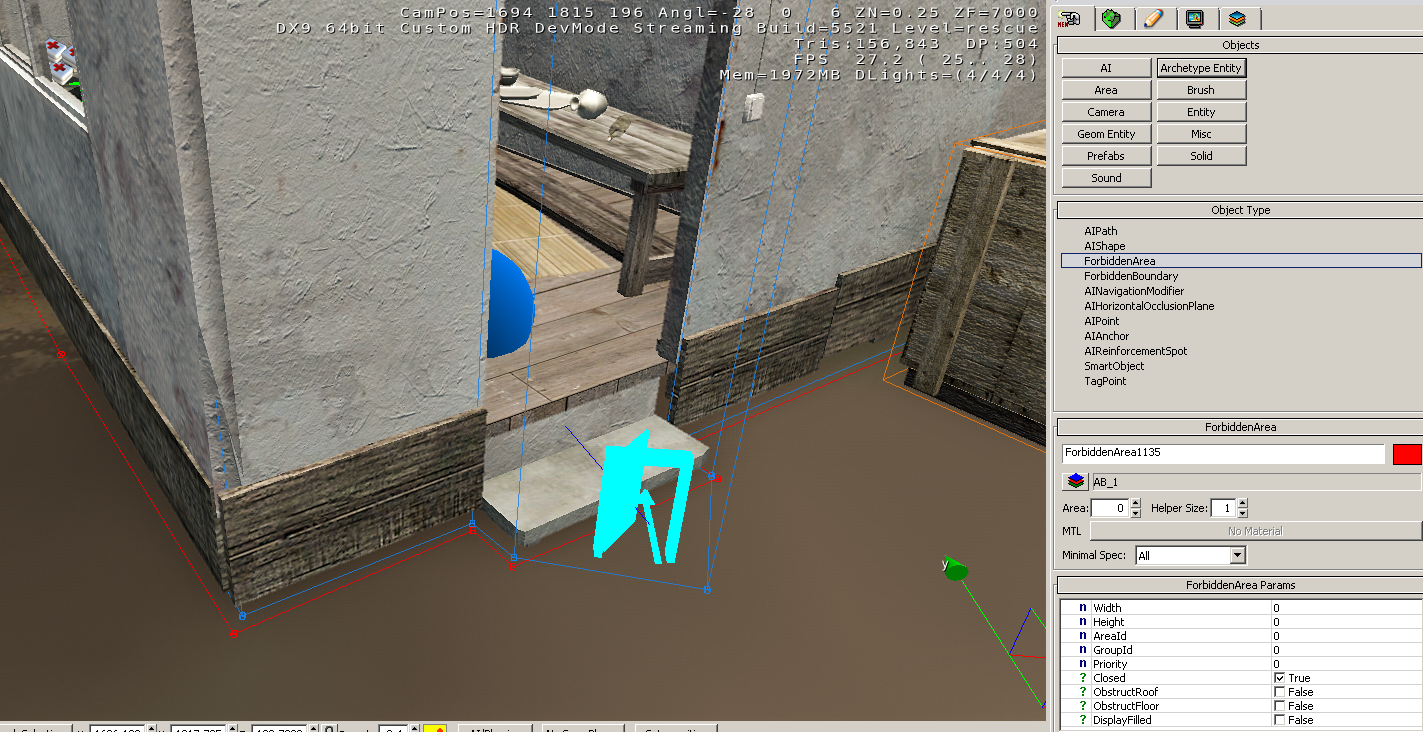
To make the AI go through doors and navigate inside the building you need to add a Waypoint Region. You need to extend one section of this Waypoint Region outside of the forbidden area, as an entryway for the AI, as below.

The 3 things you need to setup a Waypoint Region are:
You need to surround each waypoint region with an AI Navigation Modifier "Human Waypoint". (The blue shape).
Click on AI/AINavigationModifier and create an area shape of that type.
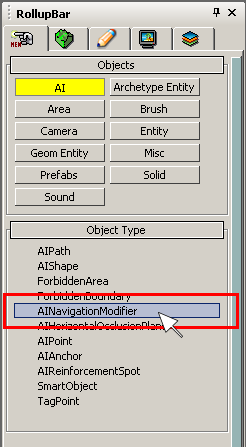
By default the NavType is set to "Human Waypoint" so no need to modify anything.
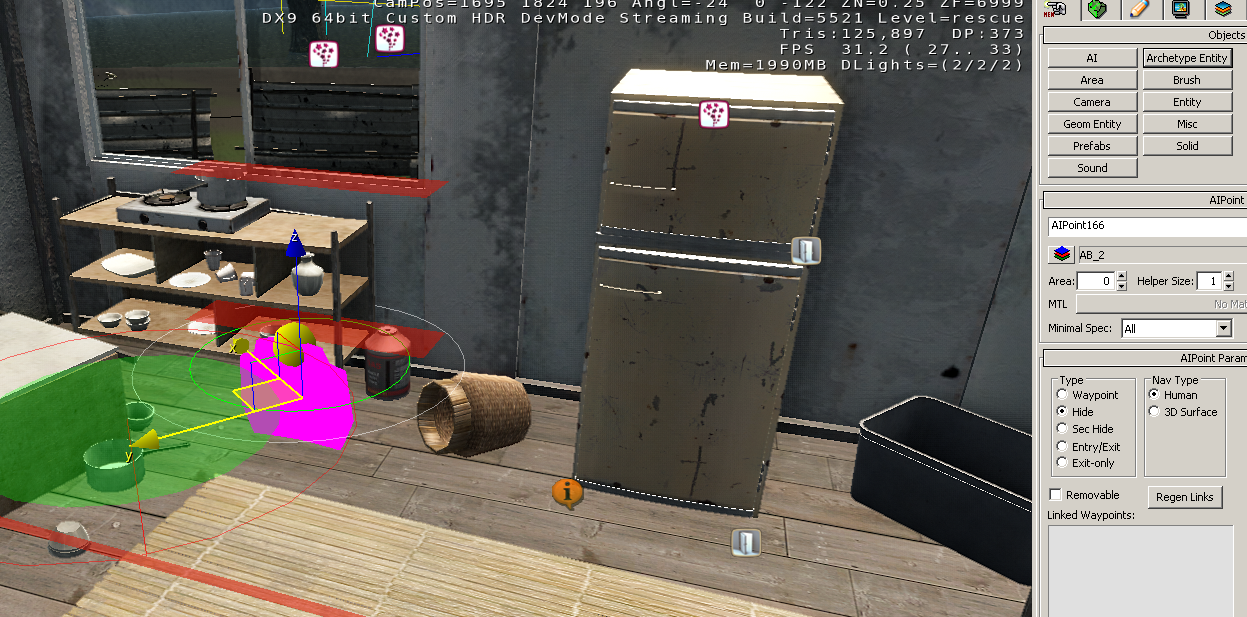
Place AI/AIpoints inside your area. You will see they turn blue once they are in a valid area.

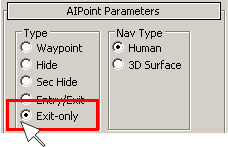
At the place where AI should be able to enter and exit the area change the type of the AIPoint to Entry/Exit (a door symbol will be displayed instead of the blue ball.
One part of the AINavigation modifier area should be outside the forbidden area shape (red line) so the AI can reach the point.

To generate the connection between all points select the AINavigationModifier shape you placed and set Auto-Dynamic in the Waypoint Connection Parameters.
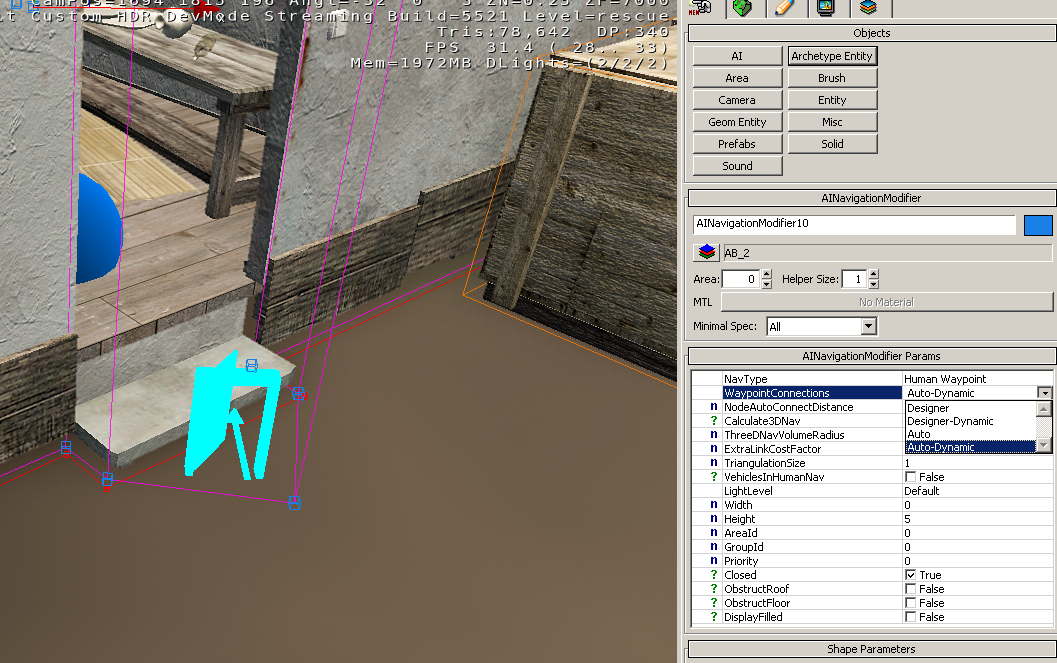
And finally click on one of the points and press the Regen Links Button:

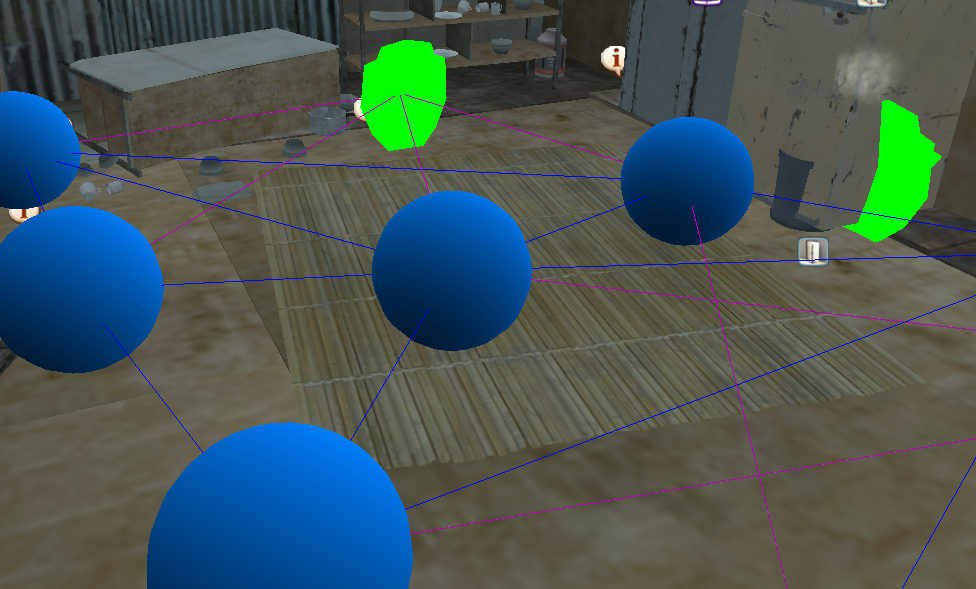
All Points should now be connected like this and the AI will be able to navigate inside the area and enter/exit it at the points where you set the specific entry and exit points.
See the section below on how ForbiddenAreas and Waypoints should be setup in terms of placement.
Water Navigation
You need to surround every area where you want something to navigate on water (i.e. boats) with an AI Navigation Modifier shape called Water.

Create an AIPath with the Road box ticked, and vehicles will automatically have a strong preference to use the road/path. AI can also be made to follow the path using the AIFollowPath flowgraph node
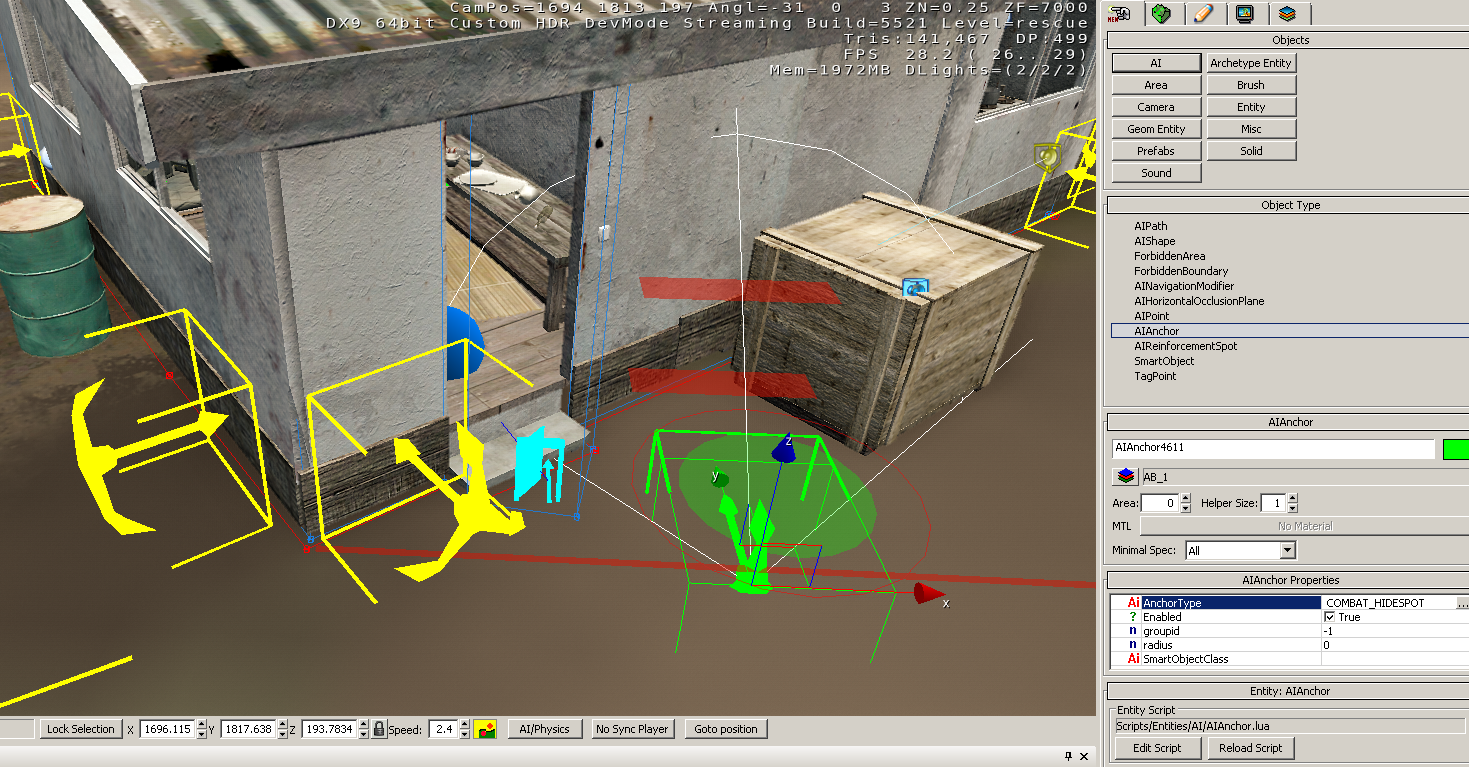
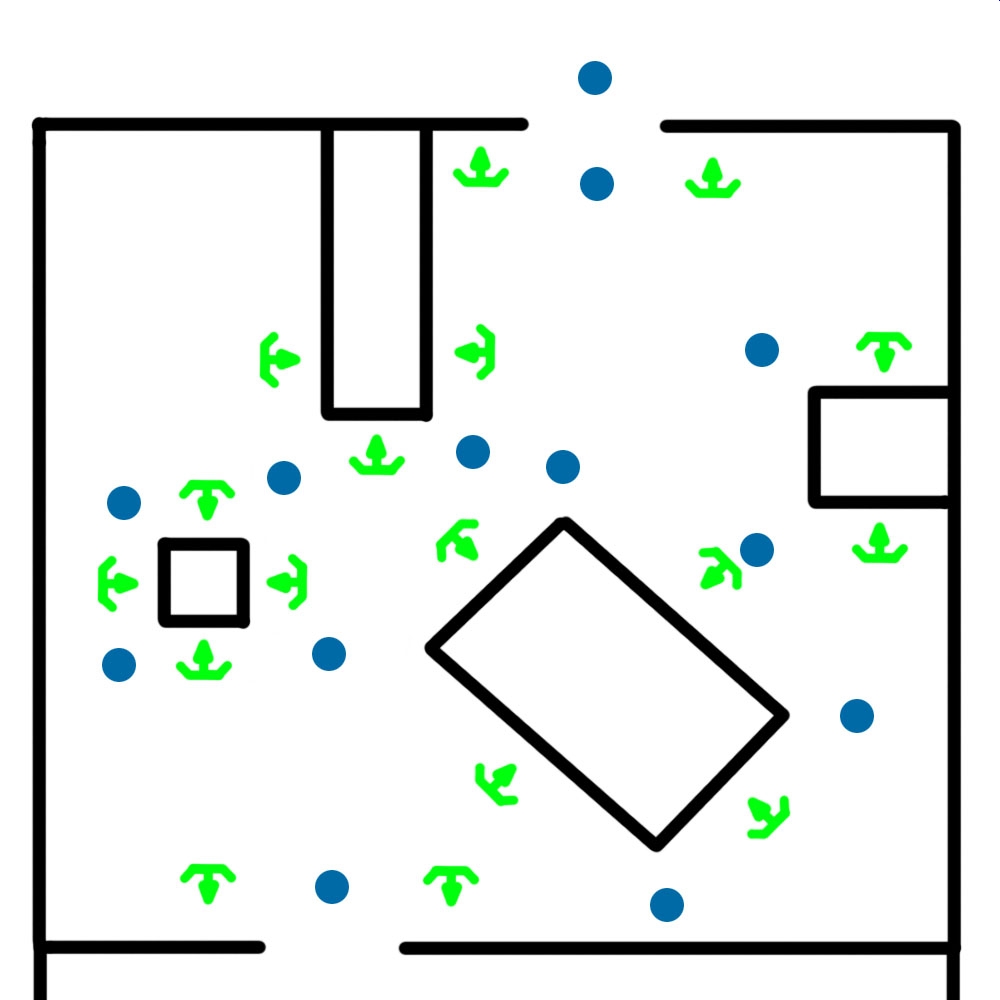
To make AI hide at specific spots you have to place AIAnchor (outside of waypoint areas).
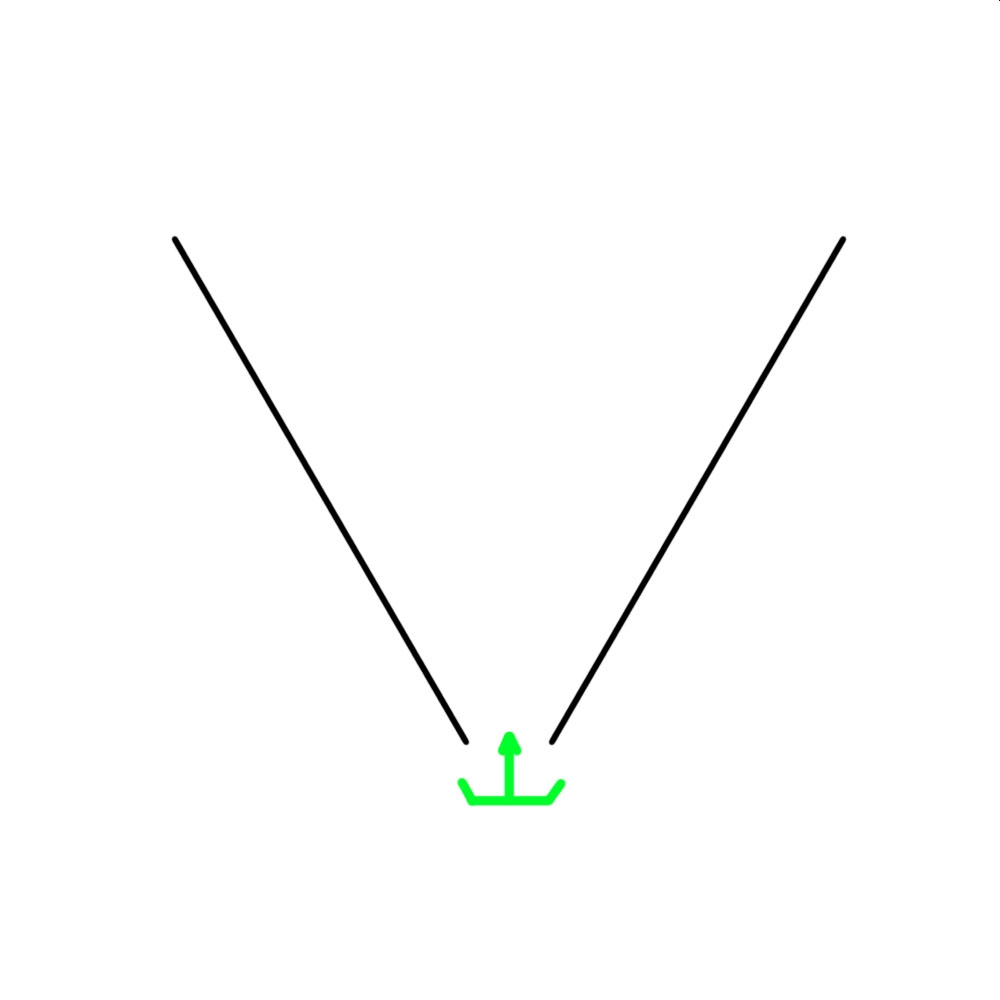
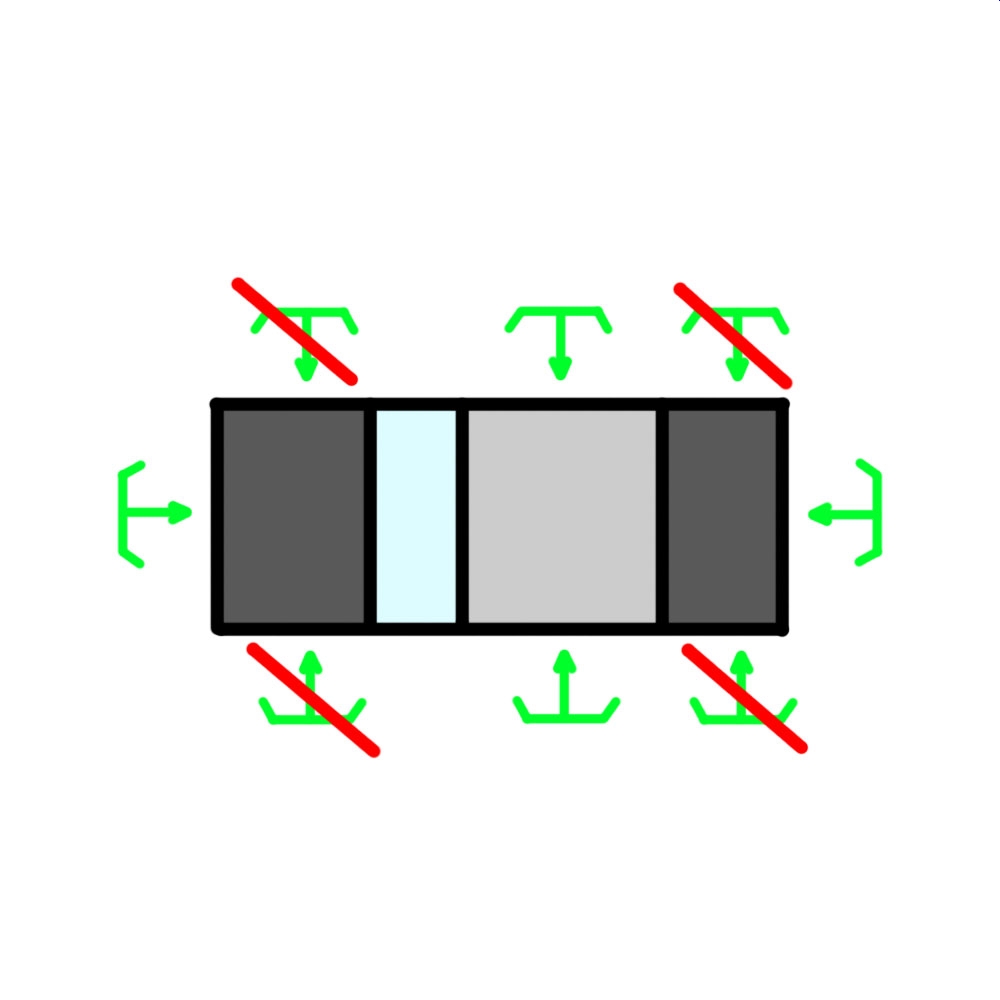
Place an AI/AIAnchor next to any solid object. Now, notice the two red bars in front of the hide point, which indicates if the AI can use a crouch/hide animation, or a left/right strafe animation. The red line on the front of a hide point shows that there is left an right enough space the strafe left and right. Make sure the Green Area is not blocked by anything, so that the AI can actually use it.

The same concept for AIAnchors applies to the AIPoint Hide Points. So, change one waypoint within a nav area to a Hide Point, by changing the Type in the AIPoint Properties.
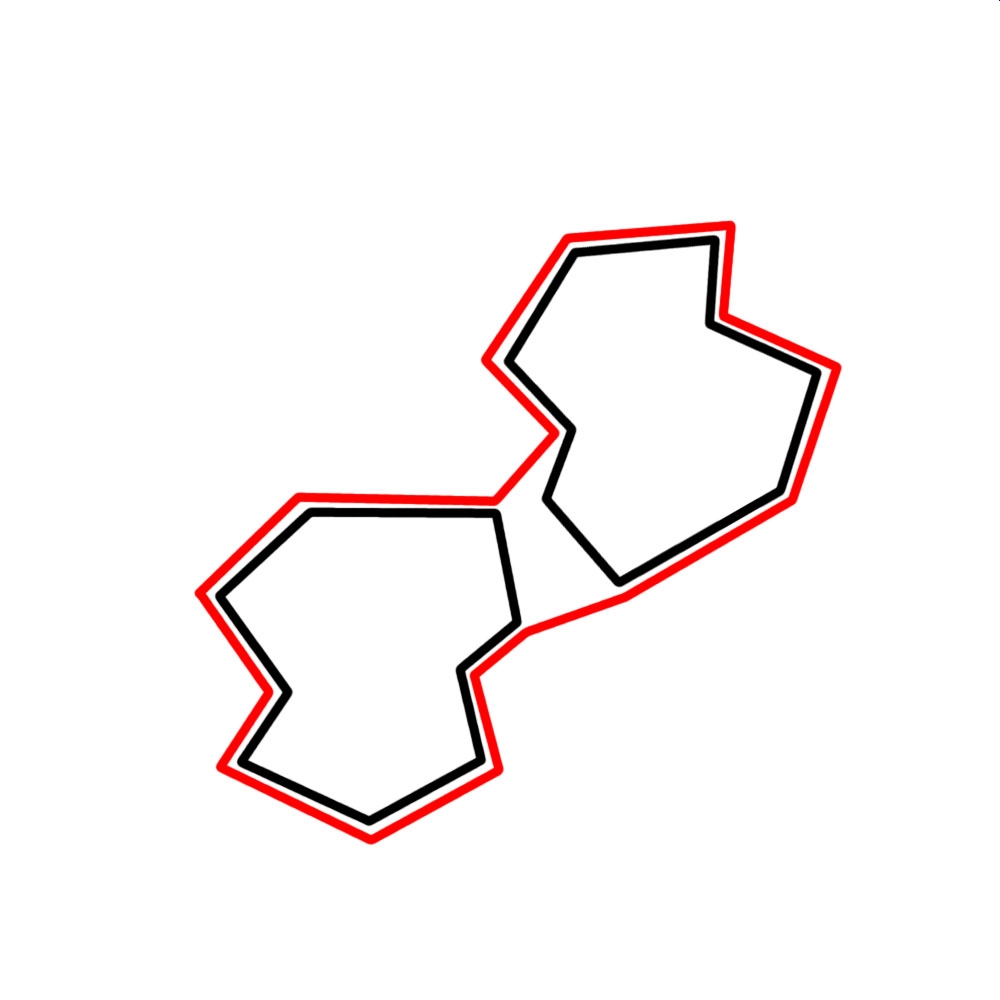
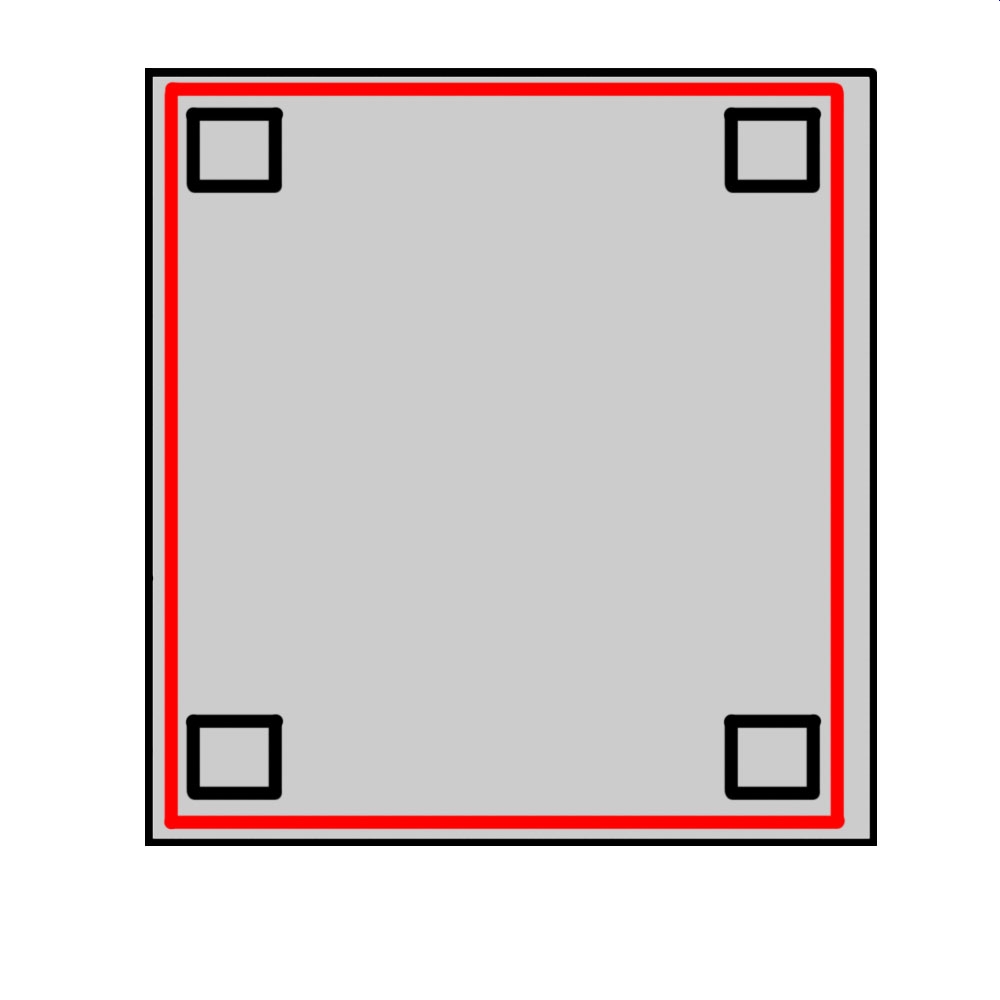
Here the forbidden area is placed too far away from the actual object.
Instead place them closer the the edges of the objects. This avoids that the AI might slip in the gaps. Now the AI navigates way better around these objects.

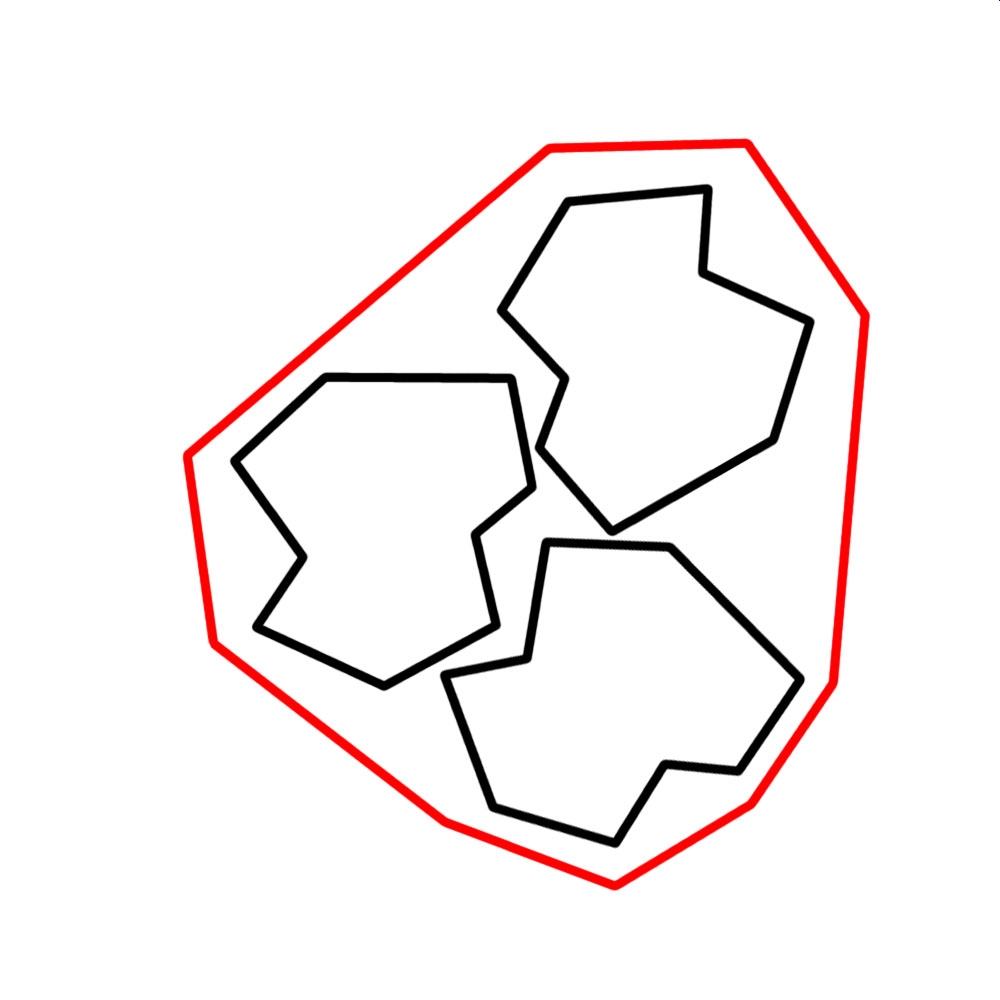
Do not place two forbidden areas so close to each other. Even if the AI can‘t fit through, the navigation will still trace a path in between.

Instead delete one forbidden area. Make one big forbidden area which contains both objects.
Do not place objects close on the edge of a forbidden area. Otherwise the AI circles around the hide objects and can slip in the forbidden area.
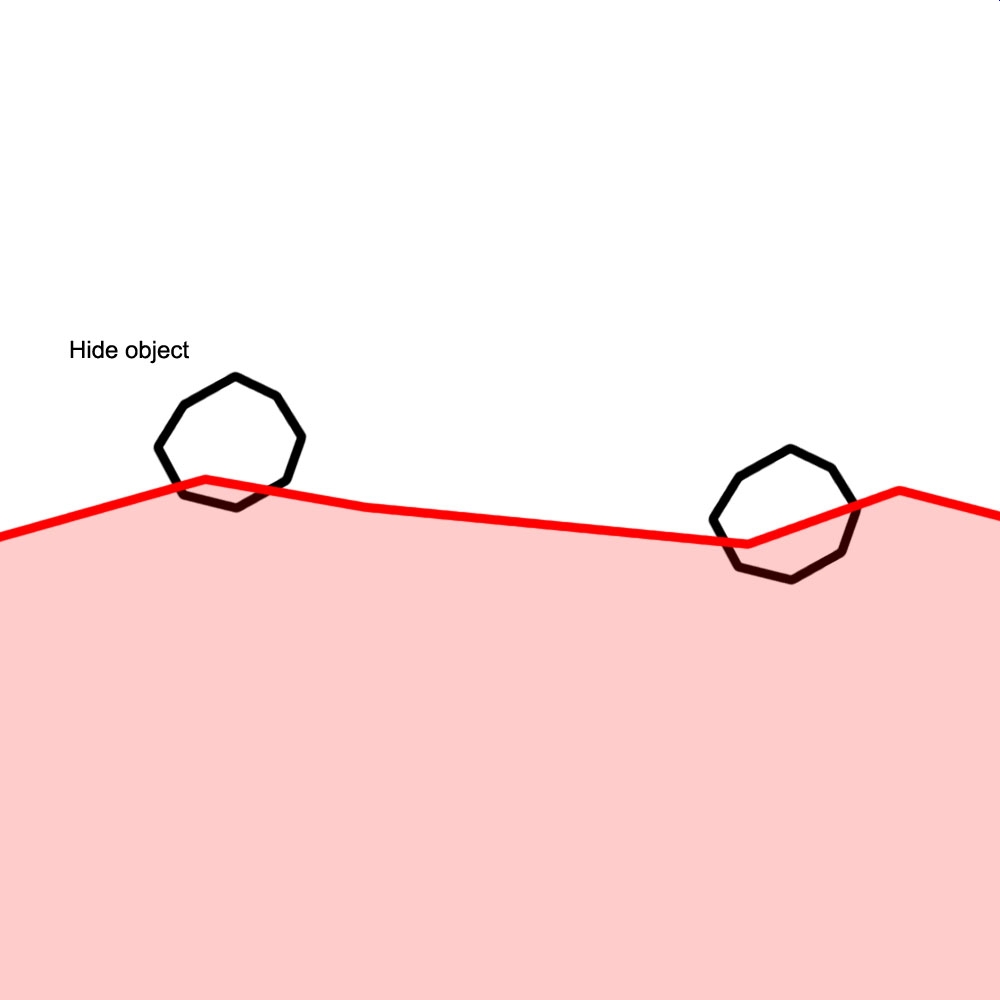
Place the hide objects either inside the forbidden area or outside of the forbidden area. Make sure that if the AI circles around the hide object it doesn‘t slip in the forbidden area
Large open sided structures should not have one big forbidden area around them.

Rather, place smaller forbidden areas around them.

The AI hides at the hide anchor if an enemy is the cone. The more AI guys you have the more hide anchors you have to place. Do not place hide anchors for just one direction. Place them for all possible directions.
Place hide anchors at the sides of an object not only at the edges. Sides provide better cover than edges.

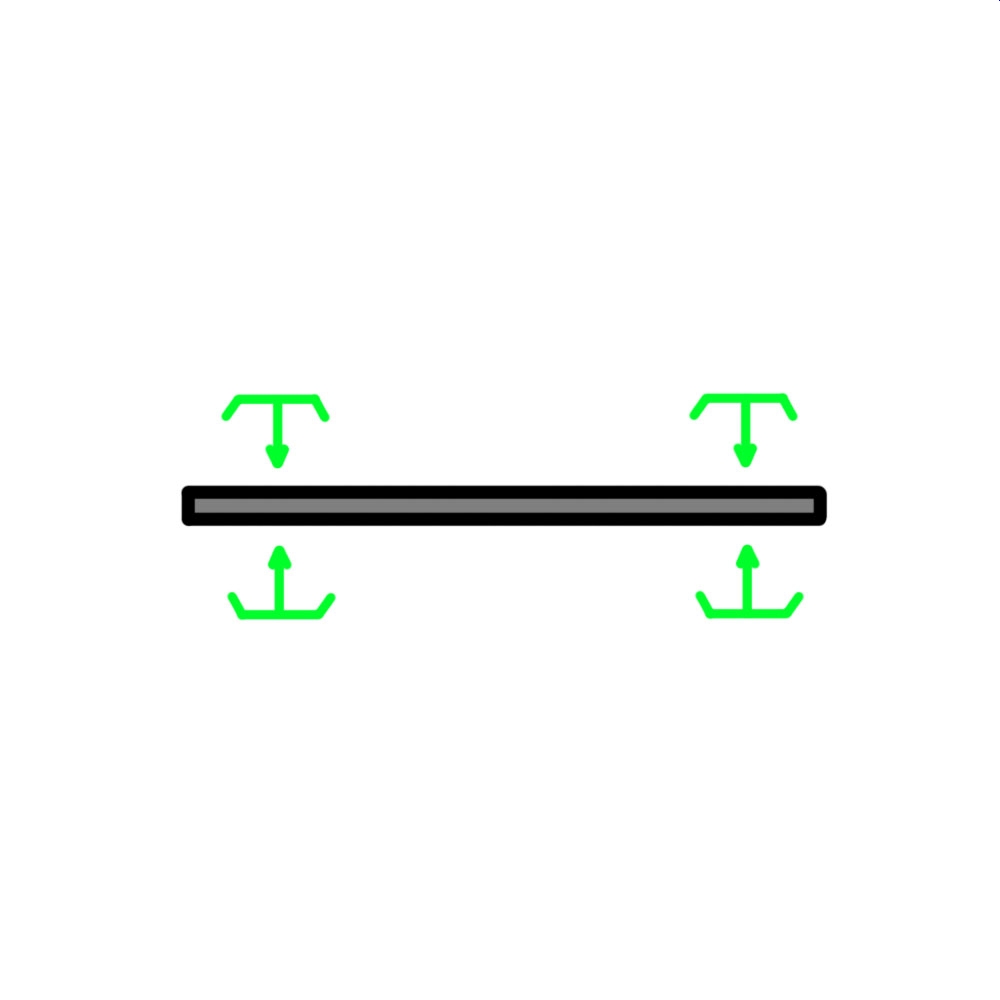
For thin objects place hide anchors close to the edges so the AI can leave their positions quickly. Do not forget to place them on both sides pointing at each other
Place hide anchors only at position where the AI has real cover. The front and the back of e.g. a car provide less cover. The middle provides better cover.
Normaly edges of a house provide less cover. First place hide anchors close to the edge pointing directly in the direction. Then place hide anchors with 45° rotation slightly away from the edge.

If you do not have enough hide anchors for many AI guys you can increase the hide anchors. The basic hide anchors are most important. Then you can increase the number hide anchors with the 45° ones.

If you have long objects do not place hide anchors in the middle, otherwise the AI has to move to far to change position. Only if there is other cover in the area can place them in the middle.

For two rooms it is enough to place these two waypoints. From every corner of the rooms the AI can reach the closest waypoint. The link gives the AI the possibility to switch rooms.

Place waypoints at the edges of objects. The AI will have no problems going around and never gets stuck.

The AI in this example is at the wall and is looking for the closest waypoint. Accidently the closest waypoint is behind an obstacle. In the new engine the AI would still find the correct one but it costs more performance. Instead place the waypoints with the same distance next to thin objects.

Take care when you link waypoints. The links should never go through or go very close to physical objects.

Avoid waypoints that are to close to links. If two AI gyus start moving they might collide because the links are running to close next to each other.
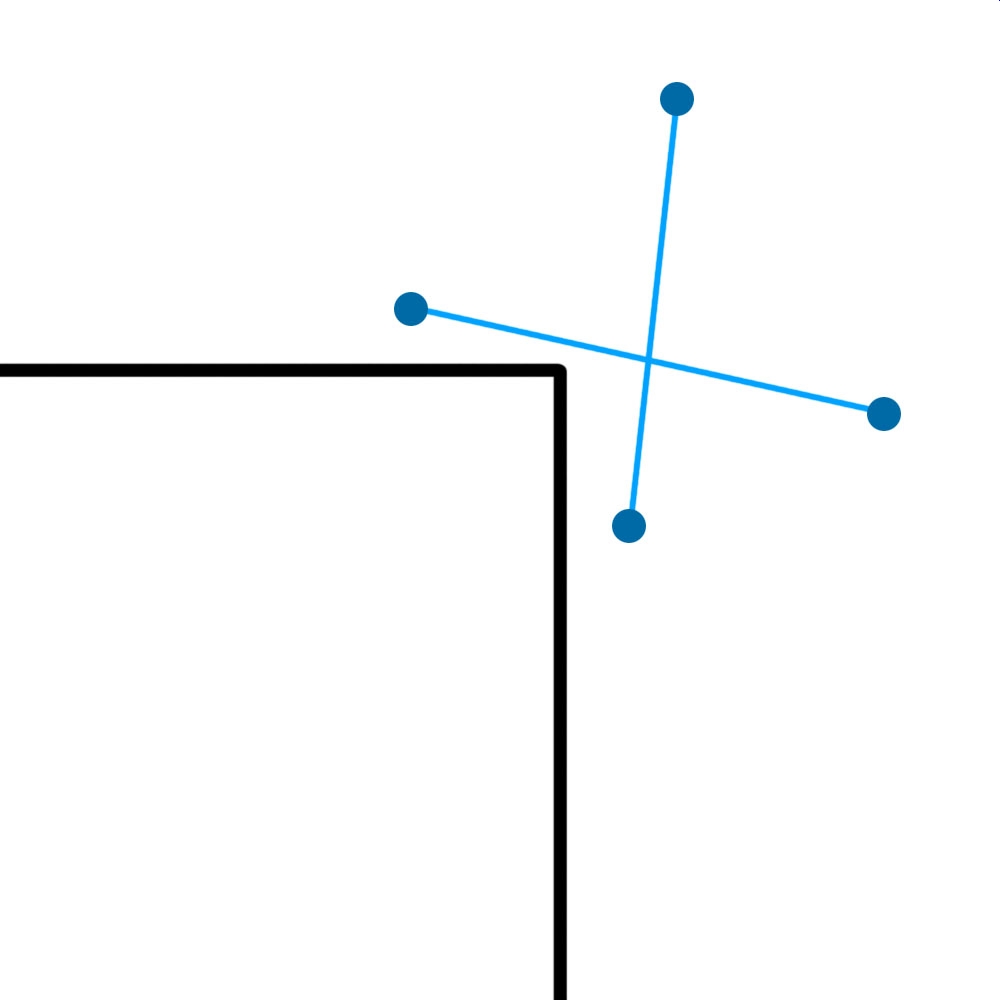
Avoid such crossing links at object corners. AI might run into each other at intersections.
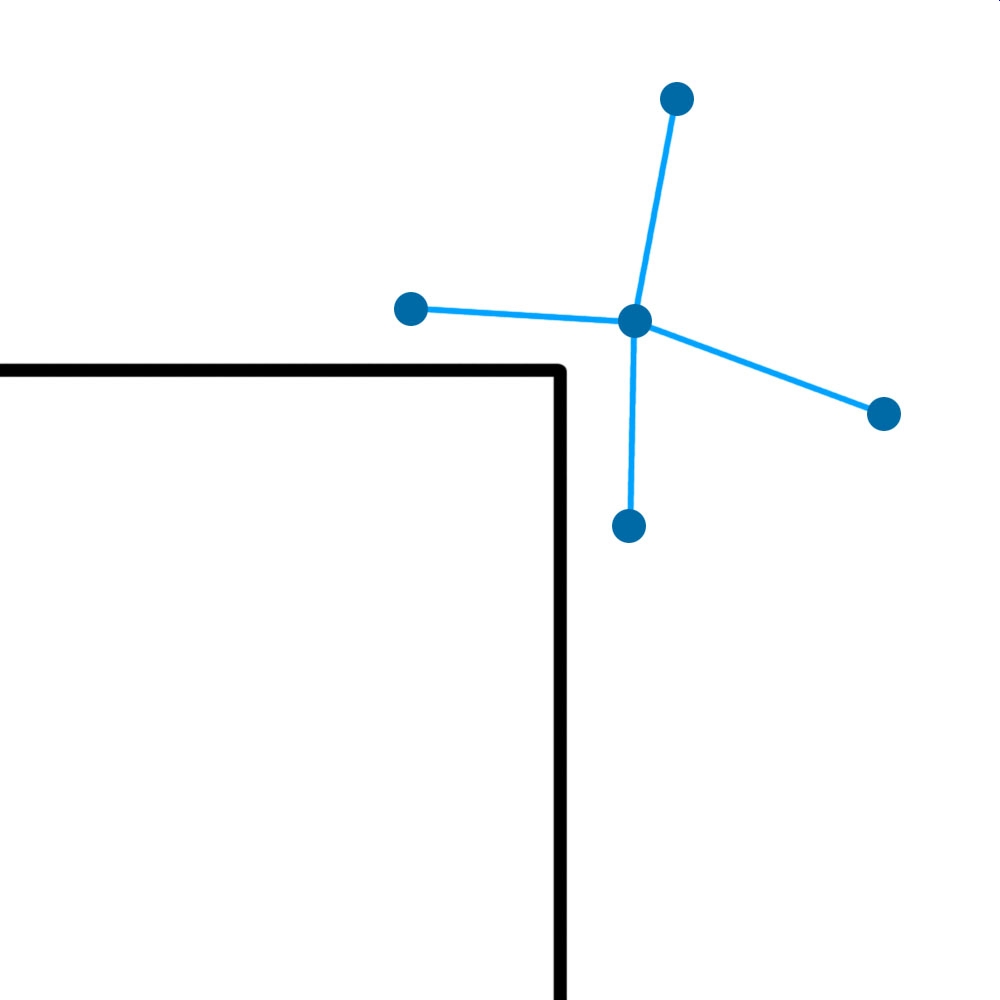
You can easily solve this by adding a new waypoint at the edge (You should have a waypoint at the edge anyway).
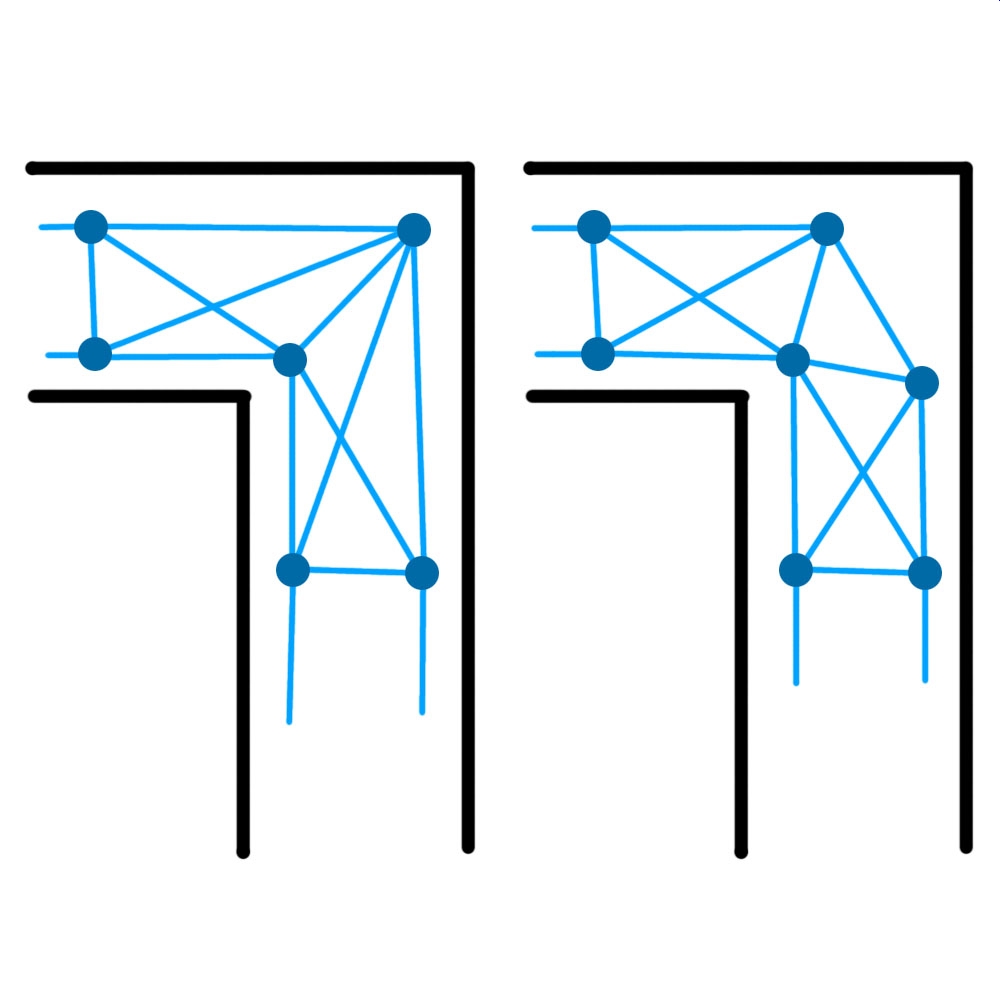
If you have alternative routes think how it would look like if you would walk exactly along the lines. Sometimes it is better to use more waypoints to simulate a more natural movement like the right example.

If you have a room first place all waypoints at all edges of objects. Only do this with objects you can‘t walk over.

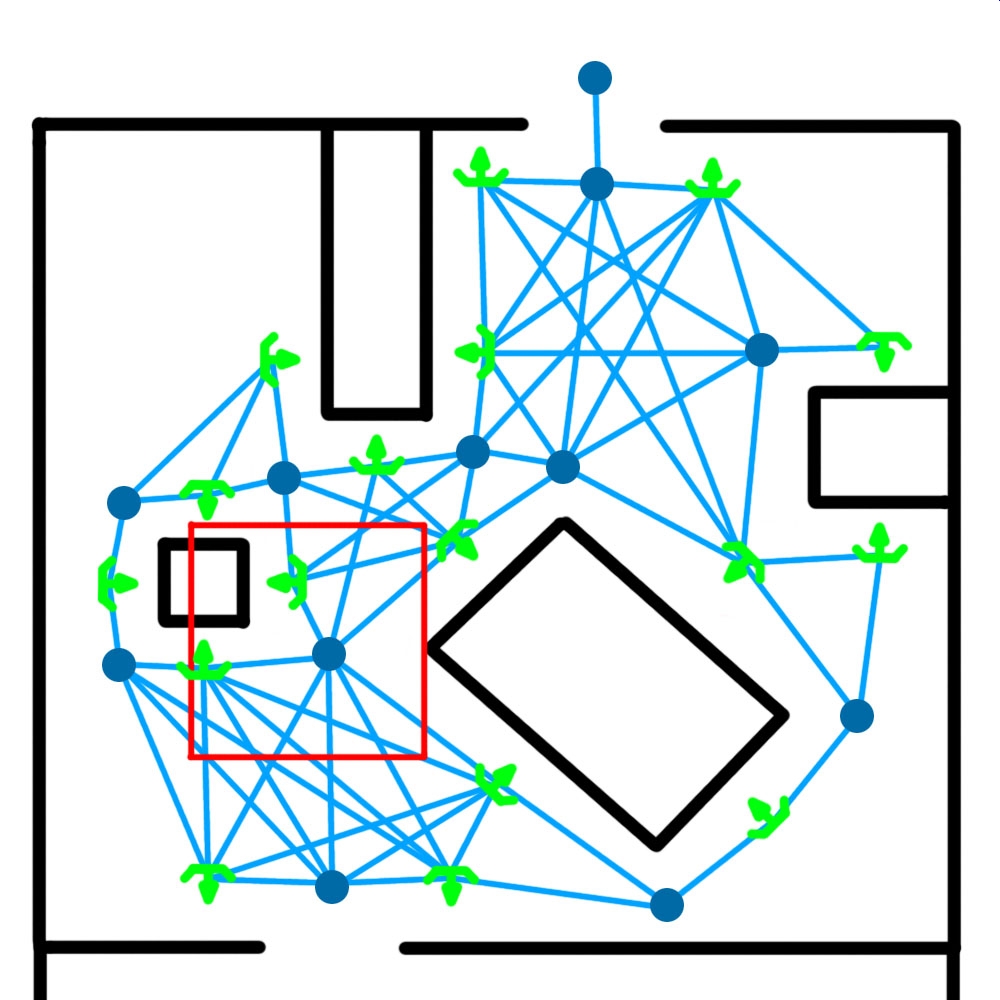
Then you look for waypoints which are to close to each other. If they are close together use one waypoint instead of two for cleaner navigation and less chance for the AI to get stuck.
After the waypoints place the hide points, follow the general rules from the hideanchors.

Hidepoints are also part of the navigation, merge hidepoints and waypoints if they are too close to each other.
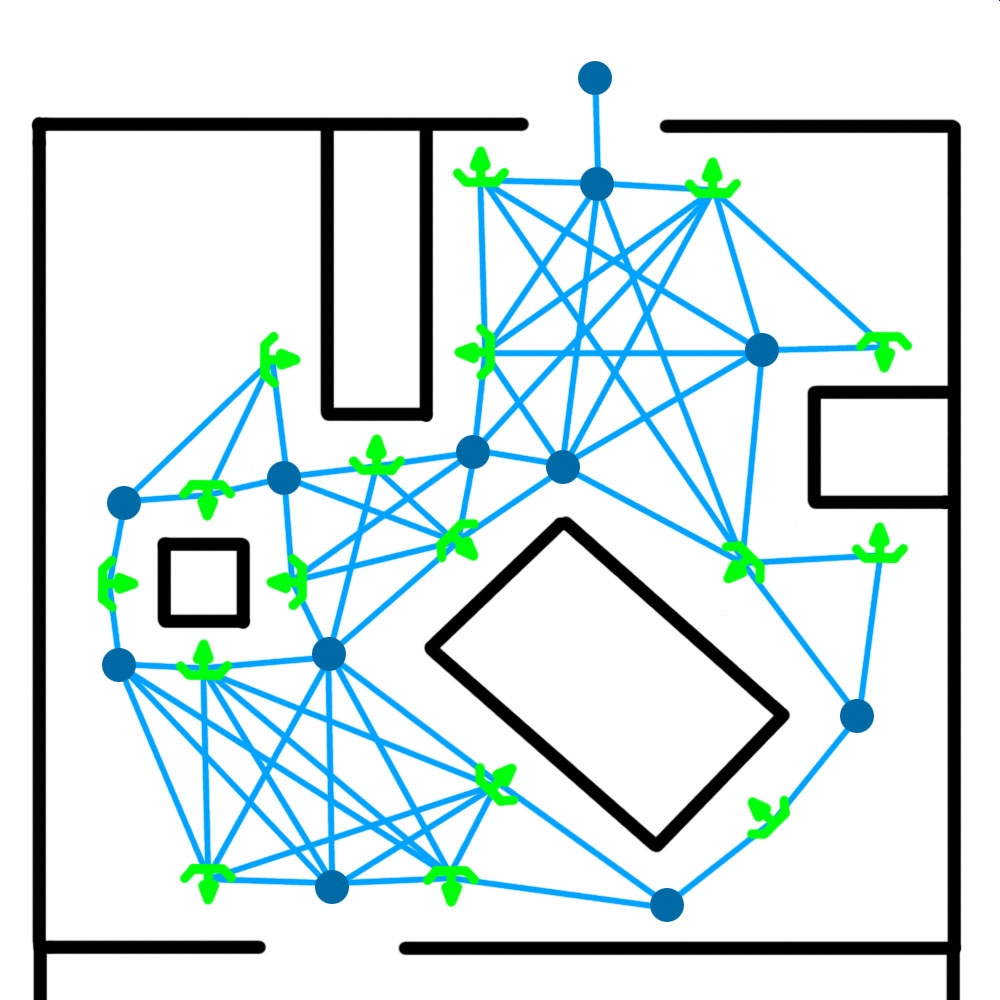
If all navigation points are placed, start linking them.
This waypoint in the middle may not provide perfect movement but it is better then AI getting stuck.
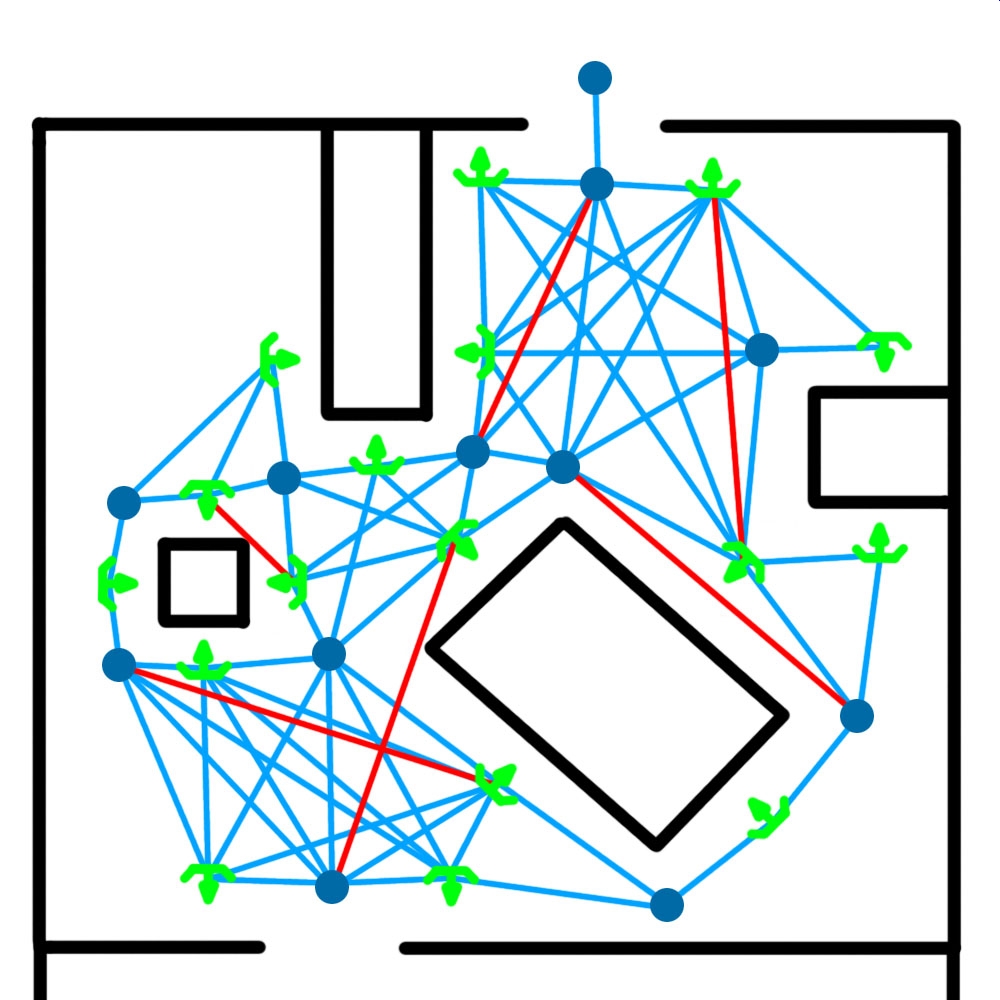
The red lines show bad links: either the links go through/close to geometry, or they are too close other links. It is okay if the AI first has to take 1-2m step(s) before walking in the right direction. That is better than AI getting stuck.