Creating Objects in 3dsMax and exporting them
Overview
In this tutorial you will create a simple object and export it as a CGF from 3d Studio MAX.
This tutorial assumes the user understands the basics of 3d Studio MAX, such as the user interface and the creation of simple geometry.
Preparing your object
Folder structure
All objects/folders containing objects must be placed under the root game folder, under the Game\Objects folder. For this tutorial, I’ll create my example object in Game\Objects\Testbox. Objects placed outside the Game folder won’t work in the engine.
The object
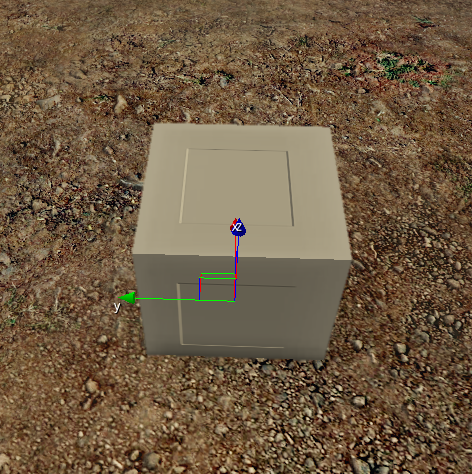
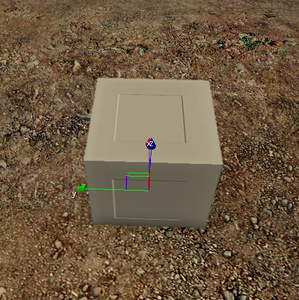
For this tutorial, create a simple box in max, a metre or two (3-6 feet) in each dimension. As the Sandbox uses the metric system for measuring distances, you may wish to use centimetres in MAX too.
- The pivot of the object in MAX will correspond to the pivot of the object in the engine.
- Make sure your object has smoothing groups assigned to it. The engine will assign a smoothing group for any polygons that lack one, which will usually result in undesirable visual results.
- Make sure your object has UVW mapping.
- You are free to keep any modifier stacks on your object, they won’t affect the exporting and your object will appear in the engine as you see it in MAX.
- The more polygons your object has, the longer it takes to export, though the exporting time is generally very quick.
- Your object should be either an editable mesh or editable poly.
Creating a material for the object
To use textures and shader effects your object needs a material. Materials are stored in MTL-files. In this tutorial we’ll create a material in MAX and transfer that information into an MTL file, where it can be edited later on with the Sandbox’s material editor.
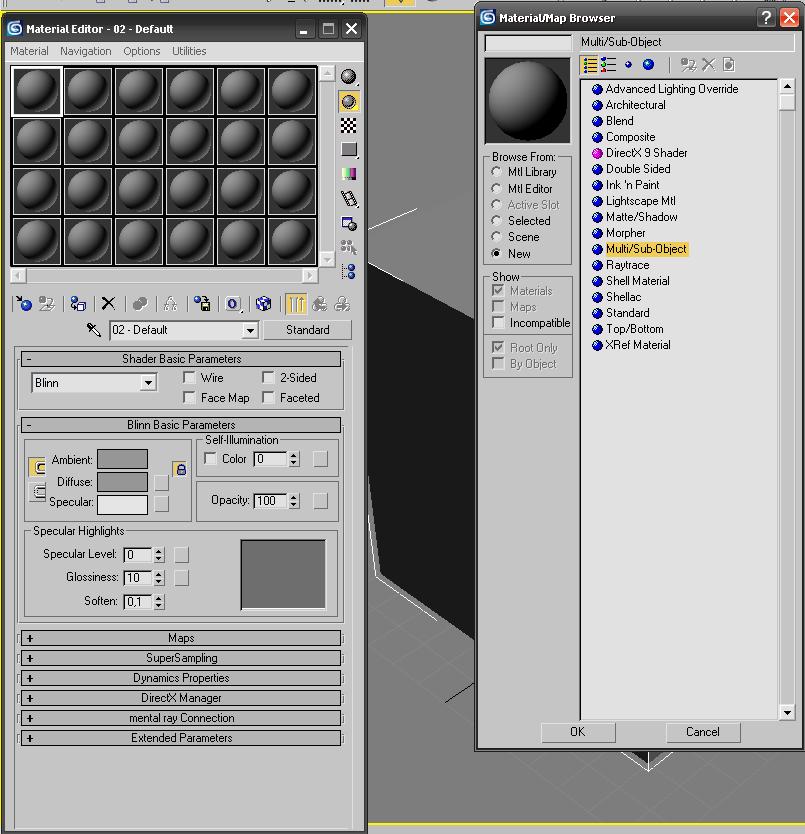
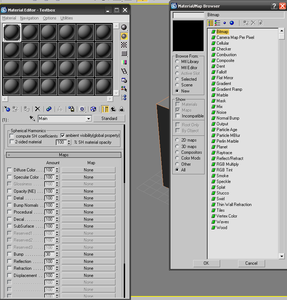
- Open the material editor in 3ds Studio Max
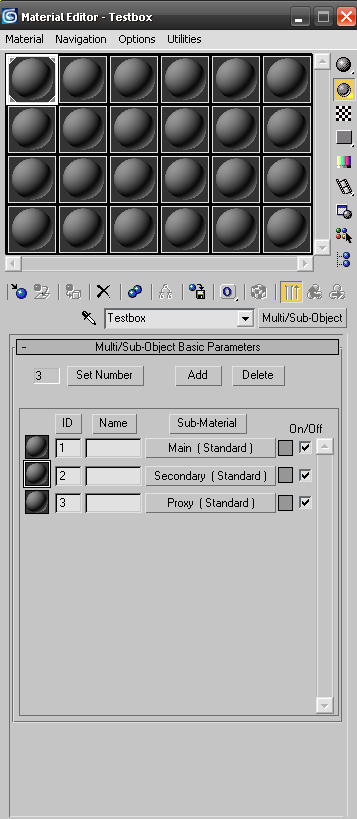
- Select a fresh material, click on the “Standard” slot and change the material type to “Multi/Sub-Object”

- Set the submaterial count to 3.
The engine supports up to 32 submaterials. The more submaterials the object uses, the more drawcalls it uses, reducing performance. Therefore it’s best to find ways to keep the submaterial count as low as possible.
- Give the material and all submaterials a name. When you create the material file, these names will be transferred. The name of the material that you assign to an object in MAX must be same as the name of the actual material file. We name the Material “Testbox” and will create a Material file later with the name “Testbox.mtl”
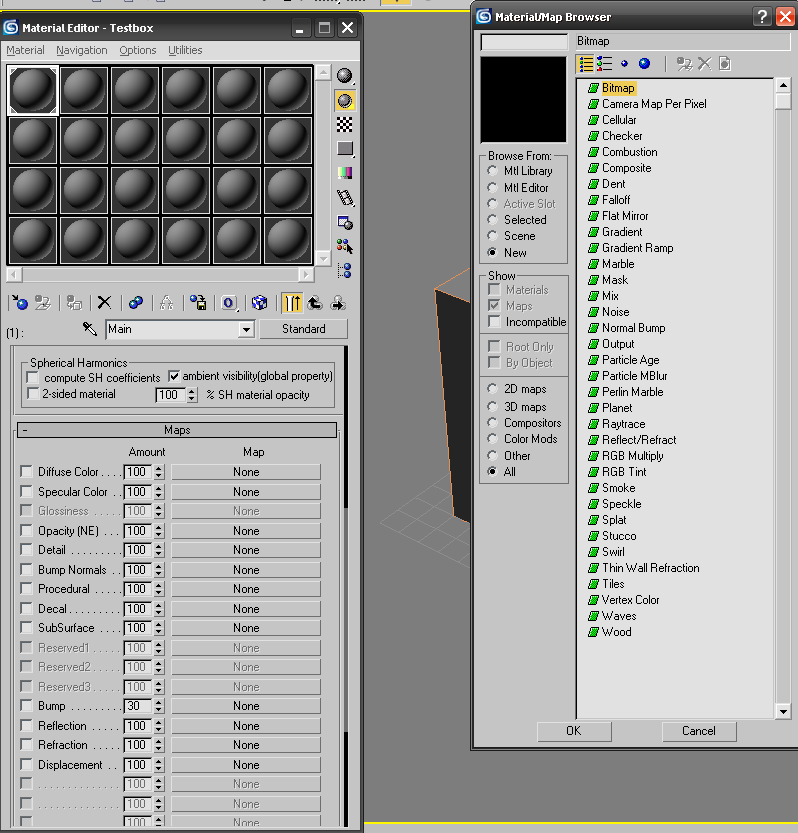
- Open each submaterial and in the “Shader Basic Parameters” rollout change the shader type to “Crytek Shader”. You should only use Crytek Shader for your objects. The other shader types will not work correctly when exported. If you have troubles here, please check that your plugins are all installed correctly.
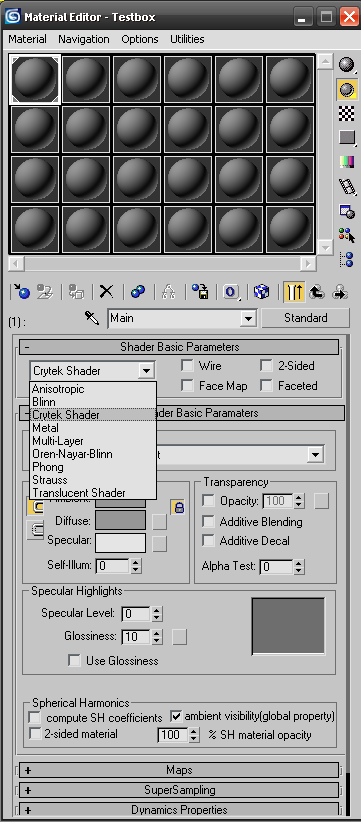
You’ll notice a new dropdown list under “Physicalization”. This list contains presets for the way the material acts in the engine. For now, we only worry about two of these; Default and Physical Proxy.
- Default is a normal material. You’ll use this for most of your materials. It does nothing special.
- Physical Proxy is a special material you want to use for physicalized geometry. It collides with physicalized geometry but isn’t rendered, meaning it’s invisible.
- The third submaterial should be a “physics proxy” (explained later). Go to this submaterial and change the physicalization type to “Physical Proxy (NoDraw)”.
Click on the “Physicalize” checkbox next to the rollout. This will physicalize the material in the engine. If this box is not checked, your object will not be physicalized, meaning it will not physically interact with anything in the gameworld.
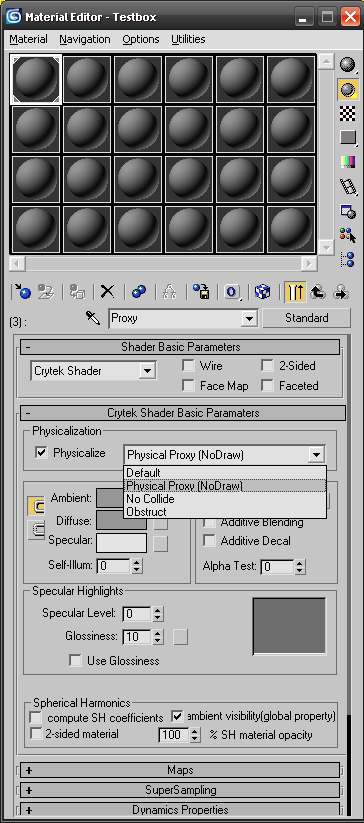
Should your object have a separate physics proxy, the rendered geometry should not be phyisicalised
- We need to assign a texture to each submaterial except for the physics proxy submaterial, which will be invisible and is only used for collision.
Go to the first submaterial and under Maps rollout change the Diffuse Color Map to “Bitmap”.
Search for the texture you want to use. You can use the textures that you created in the texture creation tutorial. All textures (except for Flash textures) should be either CryENGINE® TIF format or DDS format.
Now, select a bitmap for Bump Normals Map. Be sure to pick one with a “_DDN” suffix, other textures won’t work as normalmaps. This will be your normalmap. Using normalmaps is, of course, optional.
Repeat these steps for the second submaterial. Choose different textures.
Assigning a material to the object
- Assign your multimaterial to the object.
- change the material ID of some polygons to 1 and some polygons to 2. Make sure the object does not have material IDs beyond the number of submaterials the multimaterial has. They will appear as “Replace Me” textures if present.
Creating a physics proxy
Complex objects with many polygons should normally use a secondary mesh called
physics proxy. Physicalised objects in the game world can collide with each other and the more polygons those objects have the more intensive the physics calculations will be. Therefore you want the physics proxy to have as few polygons as possible.
Complicated proxies may also result in abnormal behaviour during collisions. This proxy is also used for player collision.
Physics proxies should always be “closed” meshes, and should not have open edges. Open edges can cause various problems with physical interaction and may also cause performance slowdowns so avoid them when you can.
- Make a copy of the box mesh in element level
- Assign the “Proxy” sub-material ID to it. It will now act as a physics proxy.
Creating a material file
- Open the CryENGINE®2 Exporter Utility. It’s a good idea to add a button for the exporter to the utility button list if you’re going to use it a lot.
- In the bottom of the utility window you’ll find “Material” rollout.
Make sure you’re currently in the parent level of your material in MAX. This means that you should not be viewing any of the submaterials, just the parent multimaterial. If you’re in any of the submaterials while creating the MTL file, the file will contain only that submaterial, nothing more.
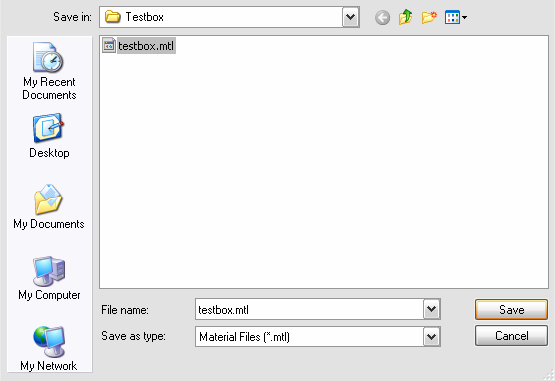
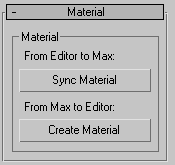
- Click on the “Create Material” button. This will open up the Sandbox material editor window. Now, Click on the “Create Material” button in MAX again. You will be asked to enter a filename for the new MTL file. Make sure this name is the same as the name of the material in MAX.

Click “Save” when done.
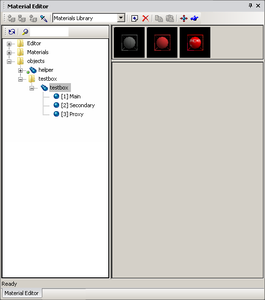
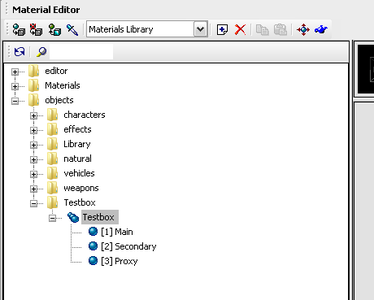
- Your material is now generated. You can expand the parent, revealing the submaterials. All the textures you chose in MAX are used by the material here. The details on the material editor are covered in a different section.
Close the material editor window.
Exporting from max
- In the Object Export section select your object and click on the “Add Selected” button under the empty list. You may select multiple objects at once.

- Click on the blue “Export Nodes” button. This will export your object. It will be generated in the same folder where the MAX file is. You can view this folder by clicking the “Explore…” button.
Your object will have the same name as the Max-file’s name (Testbox.cgf). You can name your object something else by checking “Export File per Node” checkbox under Geometry Export Options and giving the object a different name.
Viewing the object in Sandbox
- Start Sandbox and load a level.
- Click on the “Brush” button on the toolbar on the right.
- Locate your object.

- Drag and drop the object into the level.
Additional Information
Fetching/assigning materials
You can view the object’s material by opening the material editor (press “M” or click the icon on the toolbar that looks like a blue circle, or use the View menu).
Click on the 3rd button from left on the top of the material editor window, the one with a cyan box. This will fetch the material of the selected object.
You can assign any materials to your object by selecting the material (always select the parent, not a submaterial) and clicking the leftmost button in the material editor toolbar (“Assign material to selection”).
Enabling shadows
You may want to enable shadows for the brush. Click the “CastShadowMaps” checkbox in the brush properties.

Testing your object ingame
You can go into gamemode by pressing SHIFT+G when using the perspective viewport, or by using the Game menu.
If you pressed the “Physicalize” button in max on the proxy material (and assuming you created a proxy, though you may of course physicalize any material you want), you and any other characters/physicalized rigidbodies will collide with the object.
The “Reload” button in the brush parameters can be used for reloading the CGF file. This way you can make changes to it in MAX, export it, and quickly see the effects in the editor.

Note: you’ll find that the physicalized geometry does not update (if it was changed) after clicking “Reload” button. You can get around this by deleting the object and using Undo (CTRL+Z or undo button). The physicalized geometry is also automatically updated when the level is loaded again.
Console command “P_Draw_Helpers 1” will display physicalized geometry. Setting this to 0 will disable this view.
Console command “E_Debug_Draw 1” (and other numbers, beyond 10) will display various kinds of useful information about the objects in view, such as polygon count, number of materials etc.